iwr1443程序启动时间是多少呢?

Other Parts Discussed in Thread: IWR1443

你好,

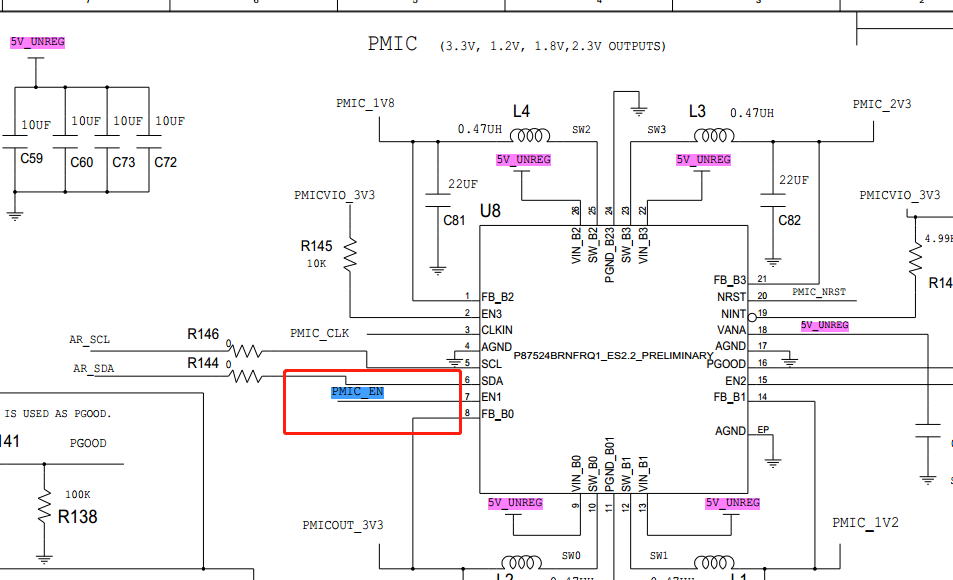
项目中iwr1443供电是另一个MCU控制给电的,我测试从该MCU控制给电到iwr1443执行完init_Task用时90ms??

这个时间有些长呀??

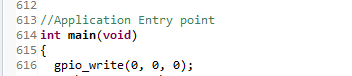
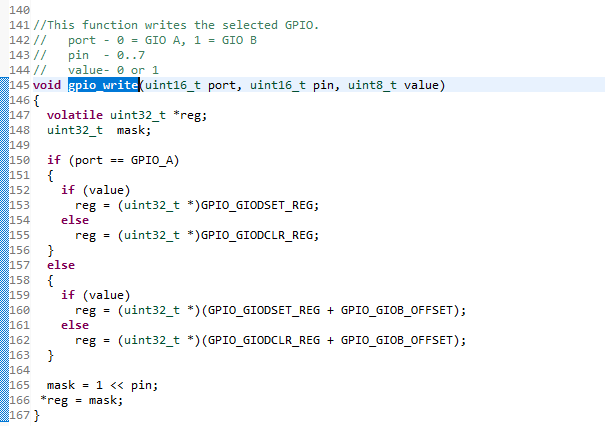
那么从iwr1443上电,至运行至main,这个时间理论上是多少呢?在iwr1443端怎么测得这个时间???

  • 你好,

    启动时间是和软件相关的。请问你使用的IWR1443是ES3.0芯片么?如果是,并且你想缩短启动时间,请参考下面的参考设计以及配套软件:
    www.ti.com/.../TIDEP-0091
  • 你好,是ES3.0芯片。
    我一直看的就是你说的这个demo,并在此demo基础上开发自己的程序。
    我说的启动时间是从iwr1443上电到运行至main,还没有执行任何应用程序,这段时间与程序无关把?
  • 你好,

    如果是做全部校准的话,时间就较长。在参考设计的文档里,你可以找到下面的信息。
    Partial calibration takes ~1 ms, while the full calibration takes ~37 ms.

    文档的Figure 10. Example of Demonstration Output里可以看到启动时间是31ms左右,具体启动时间的定义:
    IWR boot time: This is the time from when PMIC_EN is pulled high to the time when the MSP432
    detects GPIO_0 going high. This marks the start of the IWR application.
  • 你好,

    启动时间和加载的firmware大小也是有关系的,请确认参考demo 软件的相关编译配置。
  • 你好,
    IWR boot time我测是80ms,不是31ms呢?
  • 你好,

    1. demo代码里的IWR443的GPIO0操作是在复位函数里的,也就是IWR1443芯片一起来就会执行。而你的代码是比较靠后的。我建议可以参考demo代码,或者在main函数入口的地方测量。
    我实测过使用demo代码,从IWR1443的NRSET变高到GPIO0变高只有23ms。
    e2e.ti.com/.../94218

    2. 请问你现在加载的bin文件有多大?默认demo的代码里的level_sense_demo.bin是91KB。
  • 你好,

    1.GPIO0操作同demo一样,也是放在复位函数里的。

    iwr1443的3.3V,1.2V,1.8V电源是通过stm32引脚控制的,我在stm32程序中测从stm32控制相关引脚给iwr1443上电到stm32读到GPIO0引脚为高电平所用时间为80ms,在iwr1443有电源的情况下,从释放iwr1443的复位到读到GPIO0引脚为高电平所用时间为30ms。

    我看MSP432是从拉高PMIC_EN引脚开始测到读到GPIO0为高所用时间为31ms,那么拉高PMIC_EN引脚是释放iwr1443复位了?还是使iwr1443上电了呢?换句话说拉低PMIC_EN引脚,iwr1443还有电吗?

    2.IWR boot time 与bin文件大小有关系吗??

  • 你好,

    1. 拉高PMIC_EN是使能PMIC输出,到复位完成还有一段时间。看起来,这段时间有点长,请对比参考设计的电源设计。
    2. 启动时候需要复制qspi flash上的bin文件到内存里,所以如果bin文件越大的话,消耗的时间也越长。我们代码的优化是以code size为先的。
  • 你好,
    对于2,是看bin文件大小还是看PROG_RAM大小呢?
  • 你好,

    看bin文件大小。
  • 你好,

    在代码注释中看到这样一段话:

    于是,我在main函数入口的地方再将GPIO0拉低,测得从GPIO0高到变低所用时间为1ms,请问这个时间正确吗?比注释的要小。

    执行完setGpio0atReset函数,到main入口处,之间做了什么事情耗费时间了呢?

  • 你好,

    你发的代码是伪代码吧,在调用gpio_write前,你需要初始化芯片,初始化gpio驱动吧。在复位函数里都是直接访问寄存器来实现对GPIO口的操作。
  • 你好,

    这个函数是demo中提供的,里面也是直接操作寄存器实现的。而且实测确实是拉低了GPIO0,说明代码是起了作用的。

  • 你好,

    好的,这个函数也是直接访问寄存器的。

    请参考下面的文档信息,了解在运行main函数前运行了什么。
    www.ti.com/.../spruex3v.pdf
    3.1 SYS/BIOS Startup Sequence
    The SYS/BIOS startup sequence is logically divided into two phases—those operations that occur prior
    to the application's "main()" function being called and those operations that are performed after the
    application's "main()" function is invoked. Control points are provided at various places in each of the two
    startup sequences for user startup functions to be inserted.
    The "before main()" startup sequence is governed completely by the XDCtools runtime package. For
    more information about the boot sequence prior to main, refer to the "XDCtools Boot Sequence and
    Control Points" wiki page. The XDCtools runtime startup sequence is as follows:
    1. Immediately after CPU reset, perform target/device-specific CPU initialization (beginning at c_int00).
    See the "Program Loading and Running" chapter in the Assembly Language Tools User’s Guide for
    your target family for details on this step and the cinit() step.
    2. Prior to cinit(), run the table of "reset functions" (the xdc.runtime.Reset module provides this hook).
    The functions specified in the Reset.fxns[] array are called. These reset functions are called only on
    platforms where a reset is performed before running a program.
    3. Run cinit() to initialize C runtime environment.
    4. Run the user-supplied "first functions" (the xdc.runtime.Startup module provides this hook).
    5. Run all the module initialization functions.
    6. Run the user-supplied "last functions" (the xdc.runtime.Startup module provides this hook).
    7. Run pinit().
    8. Run main().
  • 好的,之后再细看慢慢消化。