环境:CCS6.2
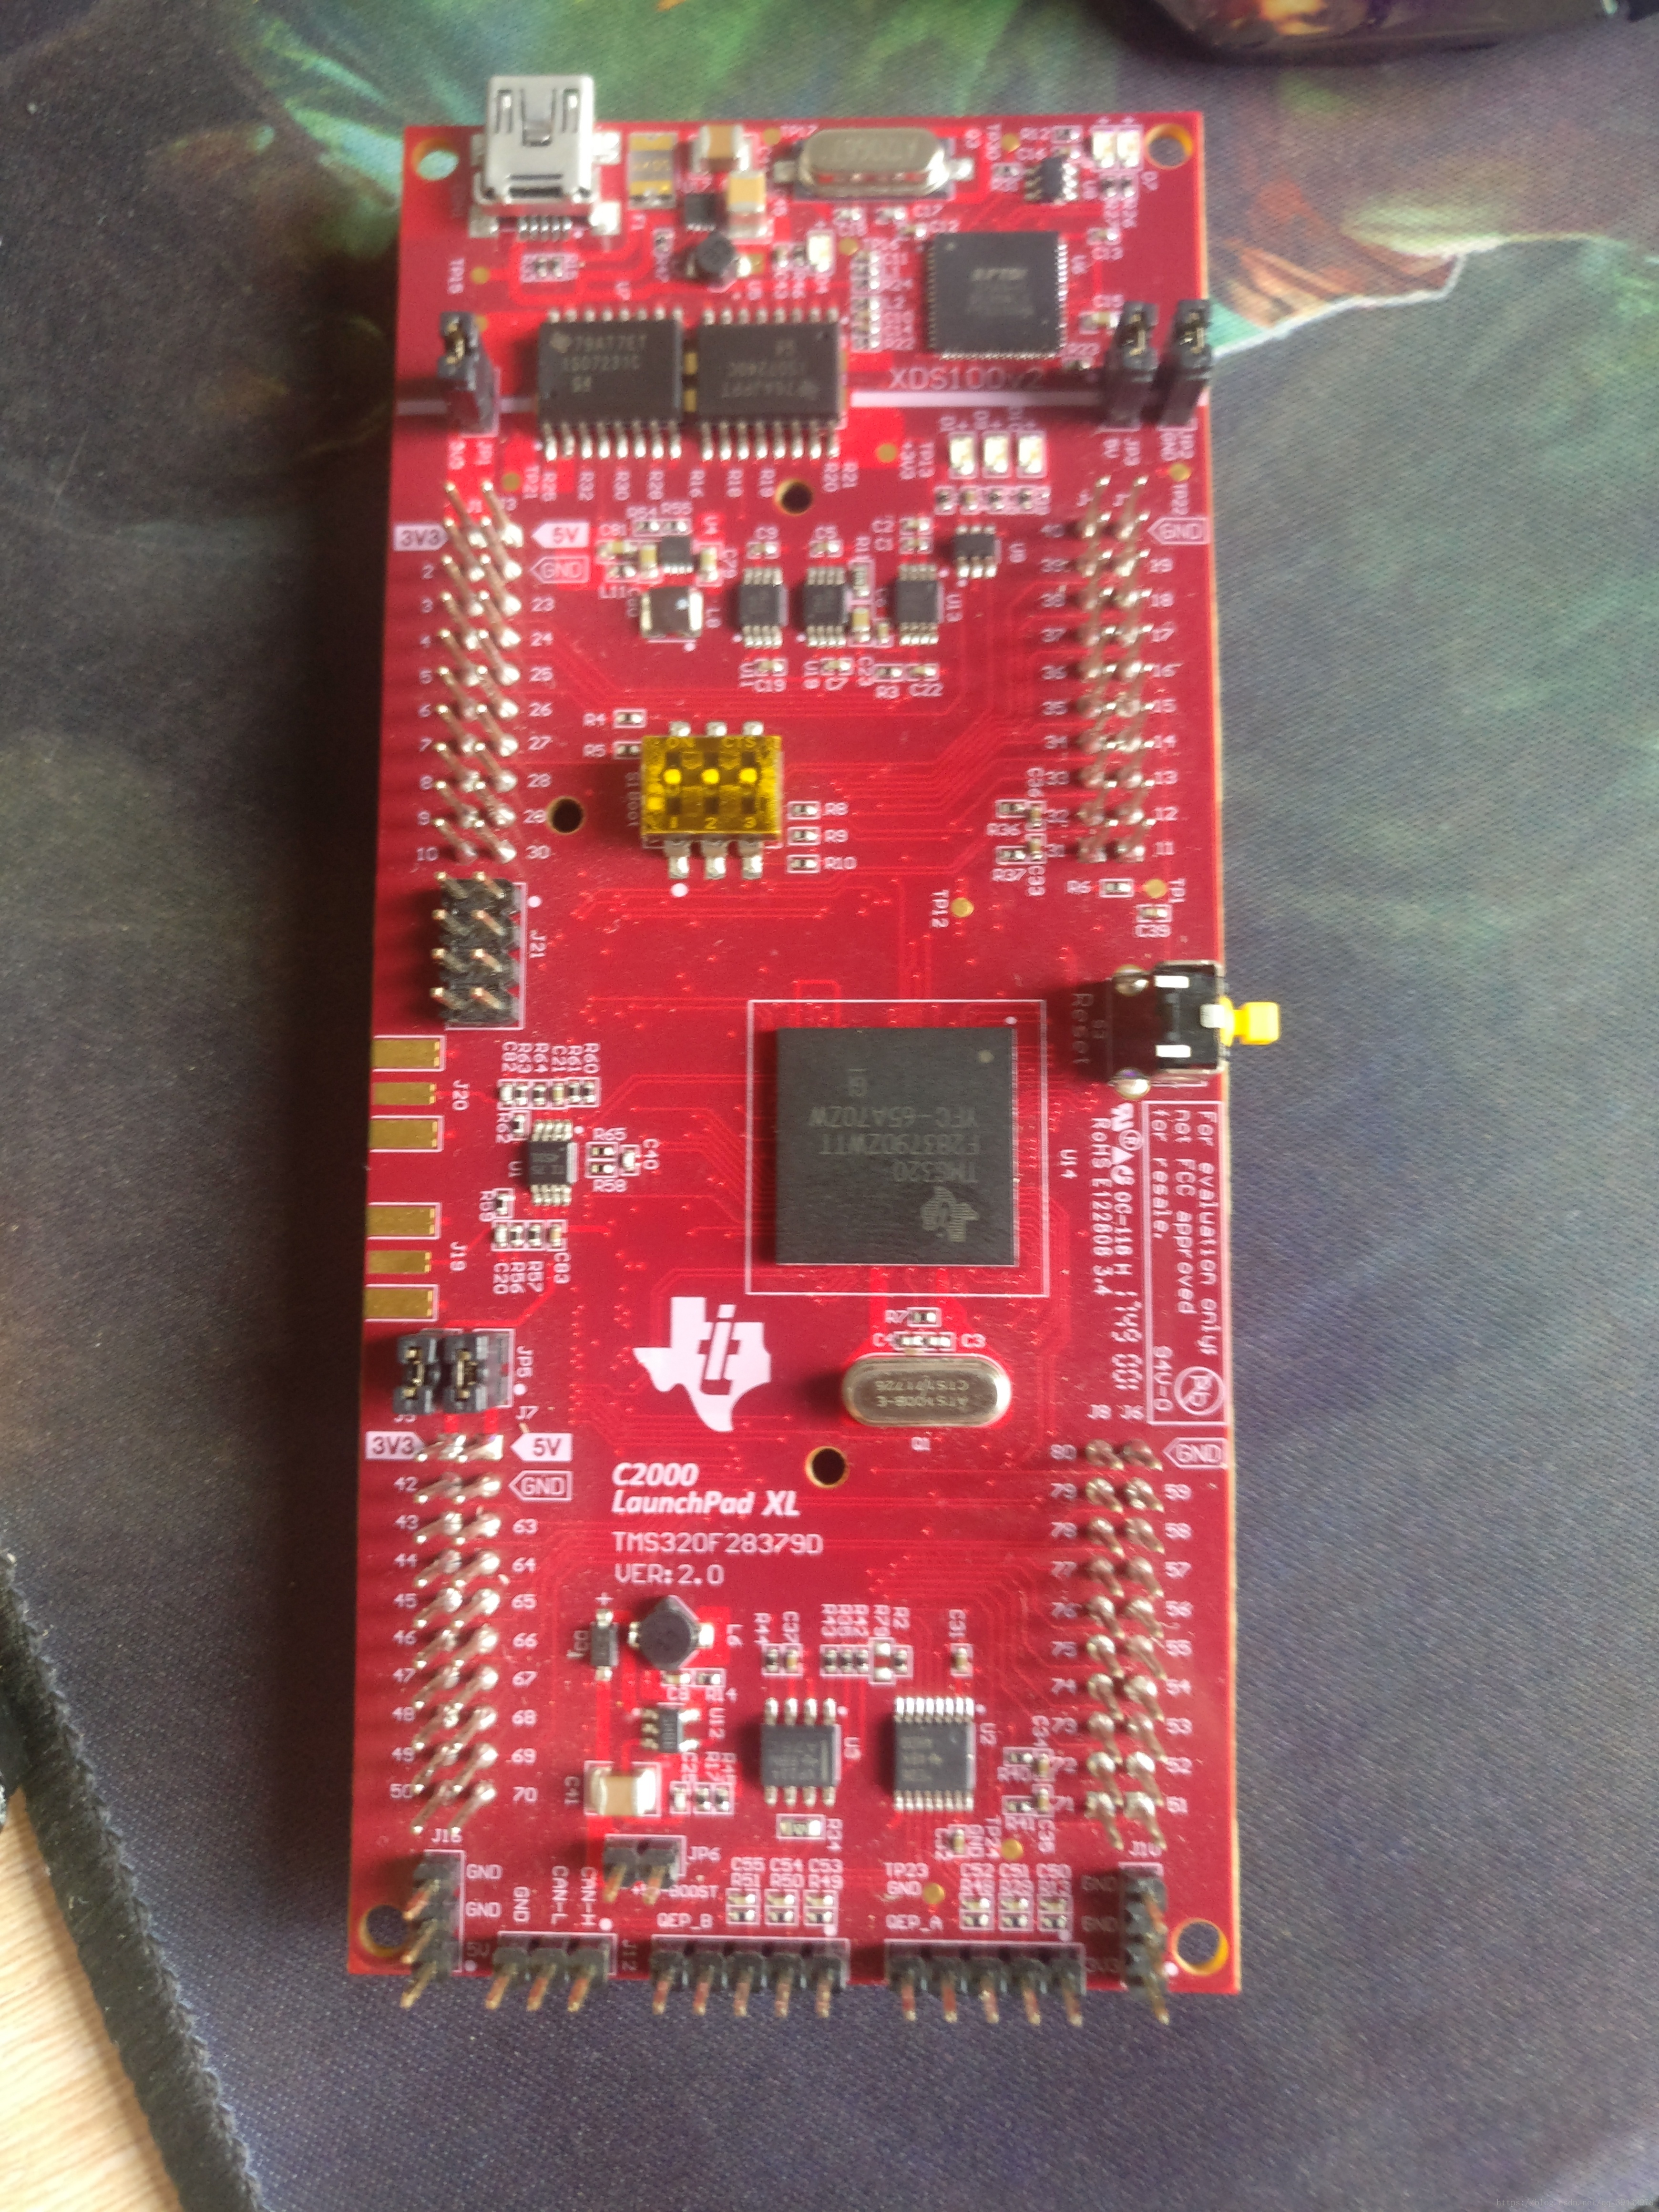
板子的话当然就是这款LAUNCHXL-F28379D啦
下面开始点灯
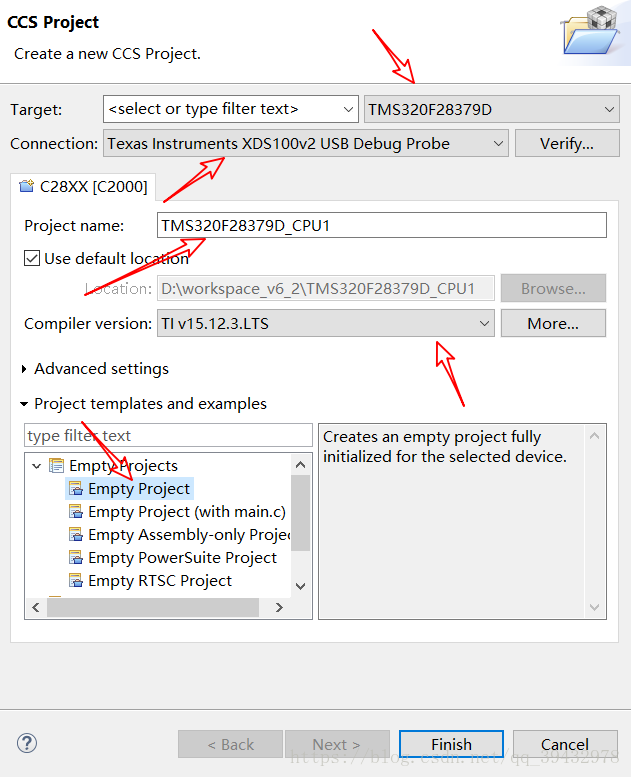
1打开CCS,File->New->CCS Project,如图所示,然后Finish
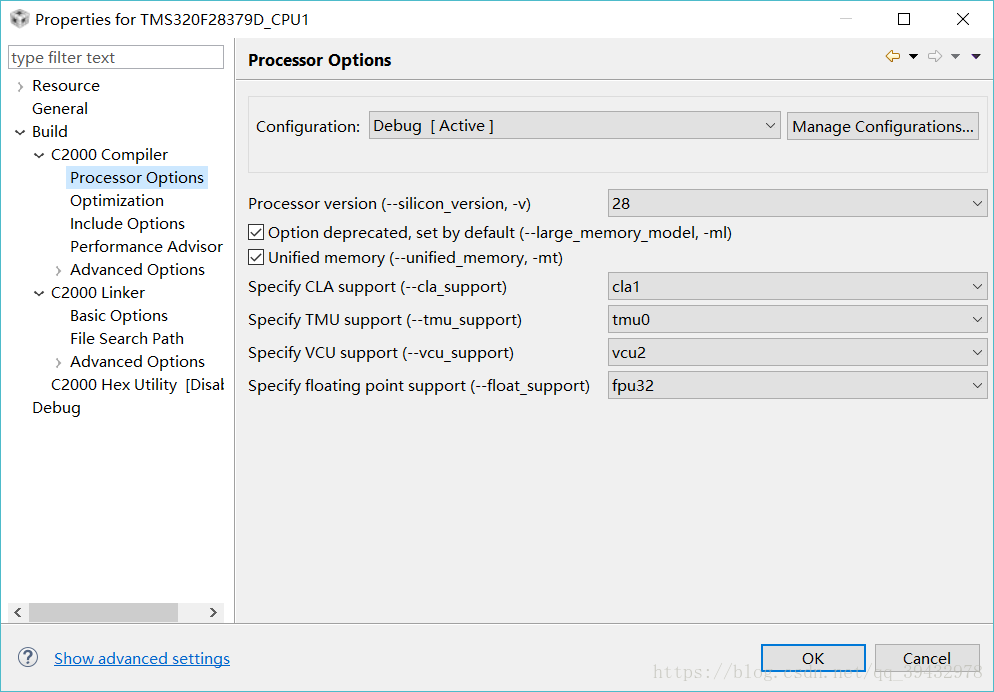
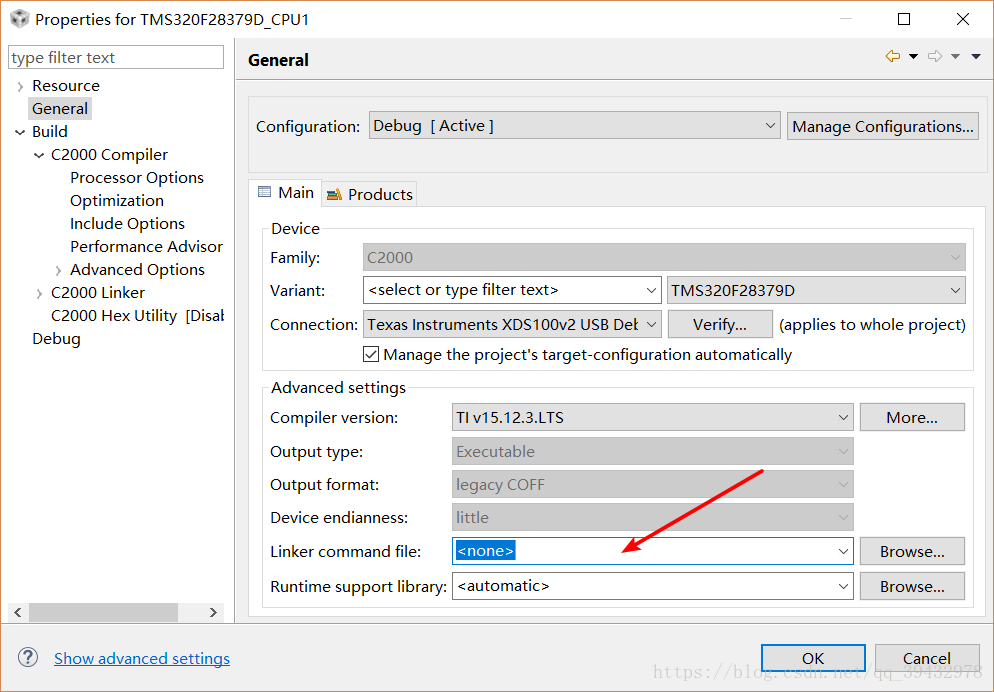
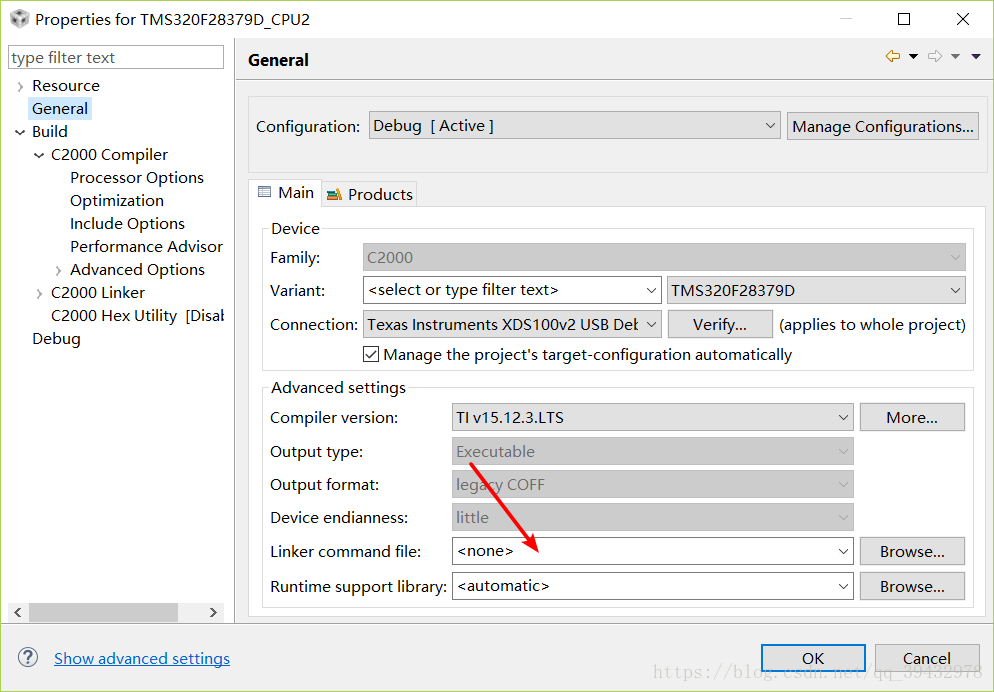
2.修改项目配置,Ringht click->Properties->Processor Options,确保你的配置如下图
3.Go ahead,
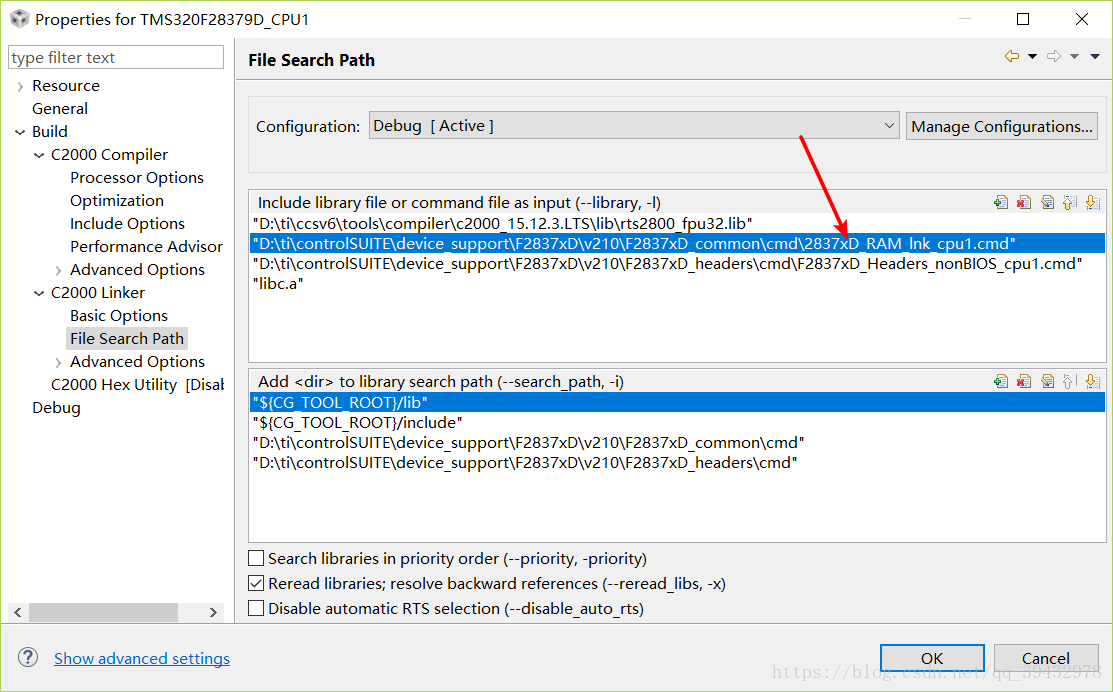
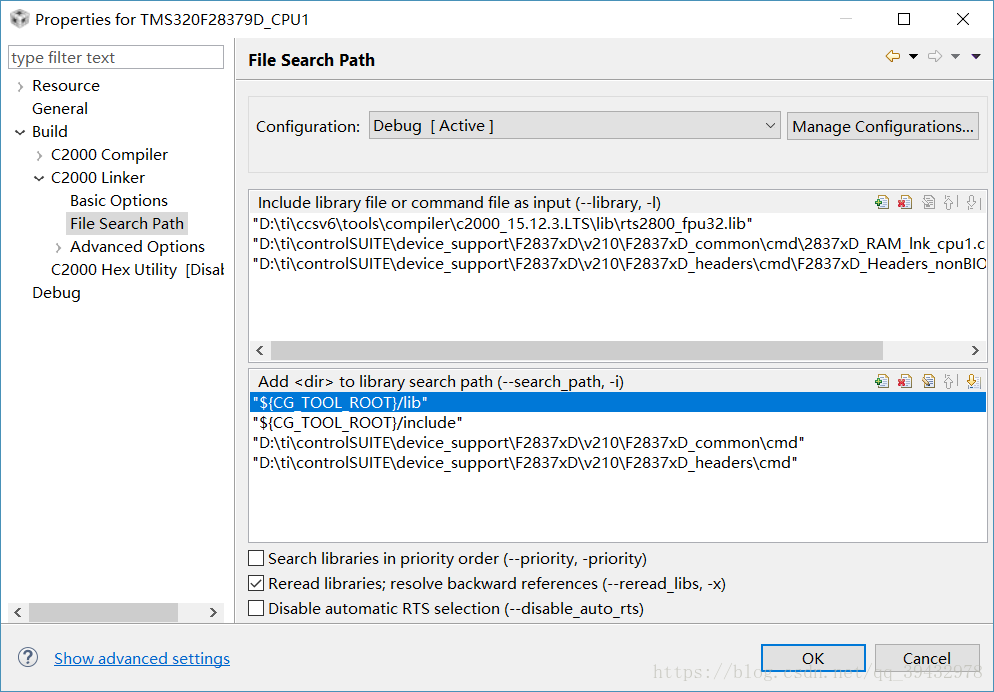
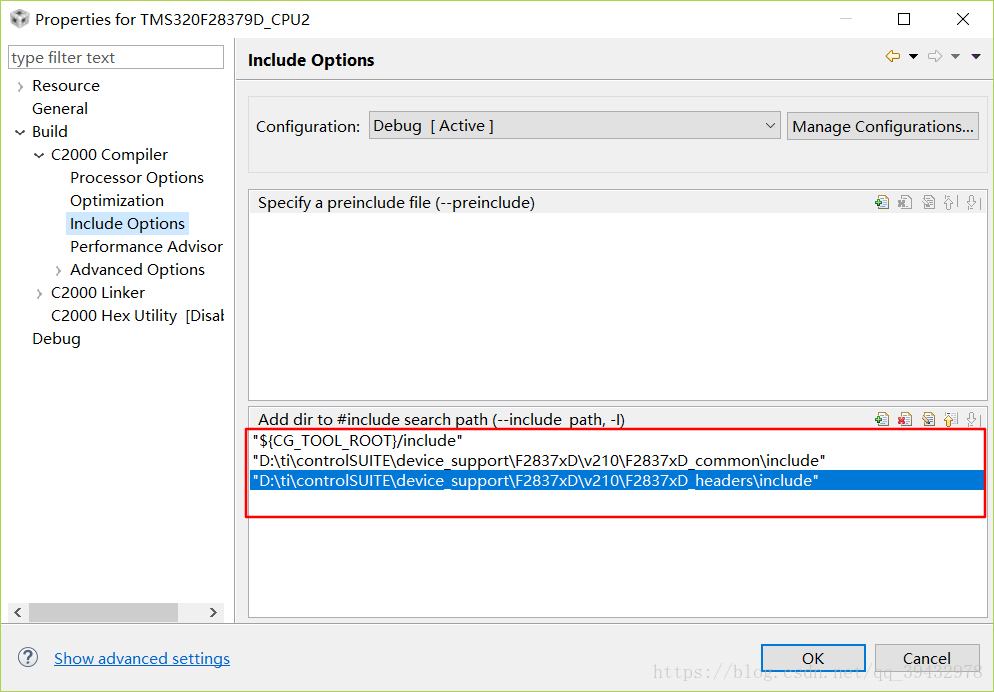
C2000 Compiler->Include Options,点击绿色加号来添加包含文件的路径,这个修改这个地方可以修改工程里include的文件夹,如下图

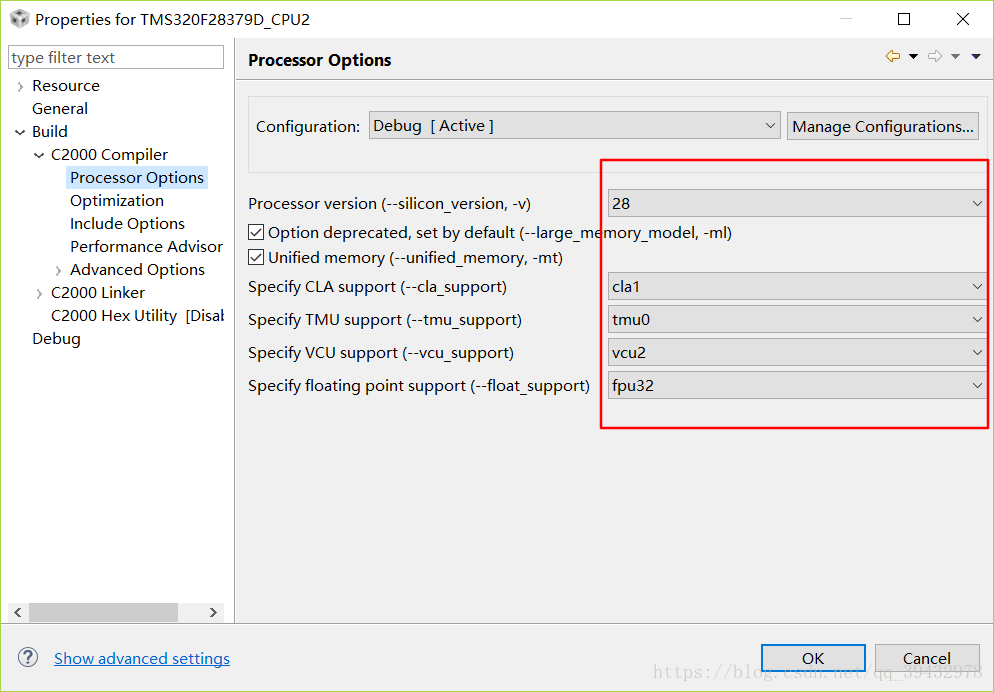
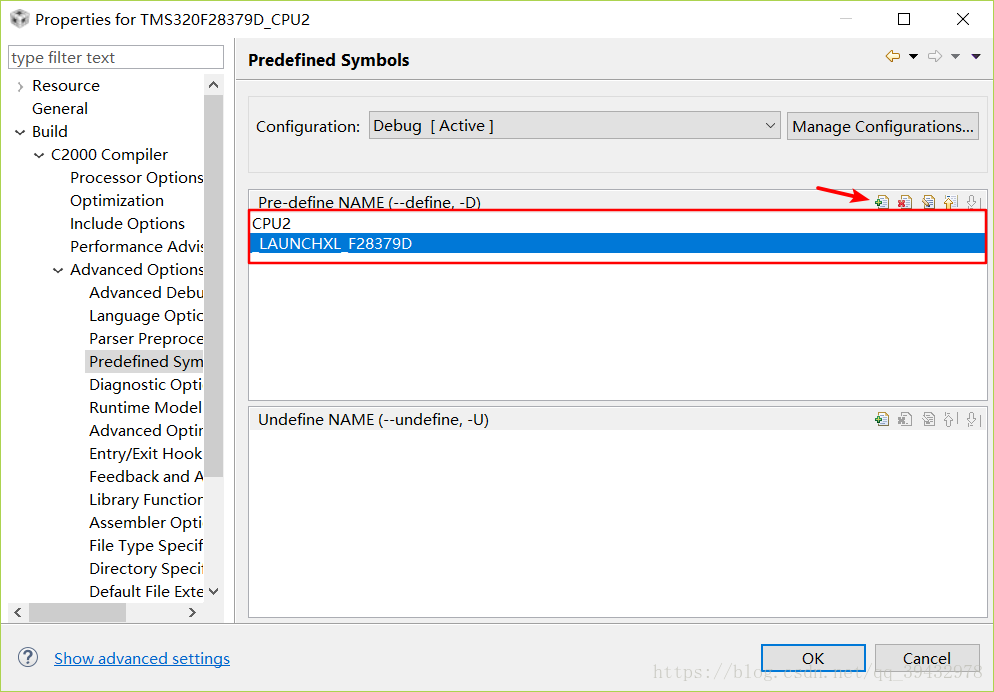
4.Advanced Options->Predefined Symbol

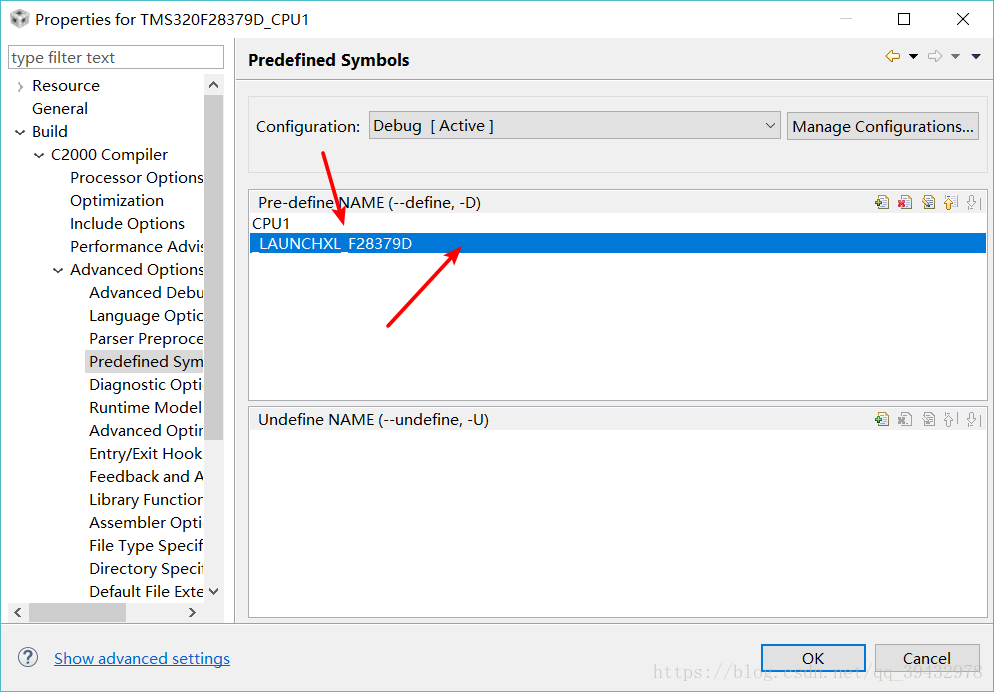

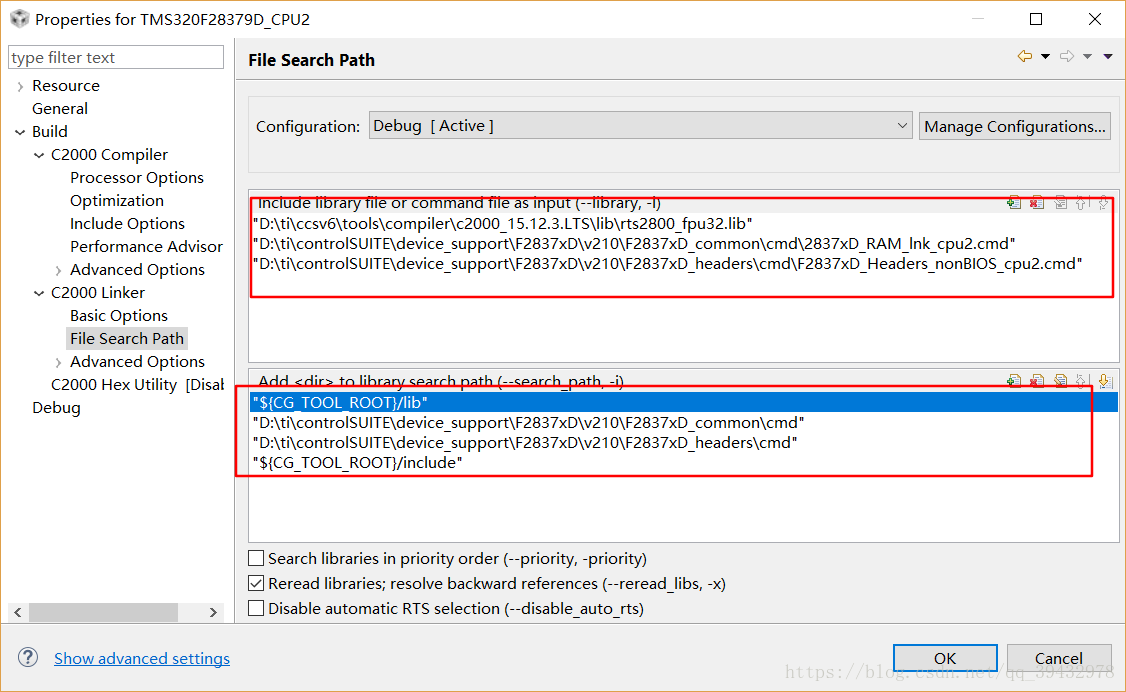
By the way,有一步文档里没有提到,就是把Linker command file改为<none>,否则后面编译的时候会报错,因为第5步include command的时候已经将cmd文件包含进去了
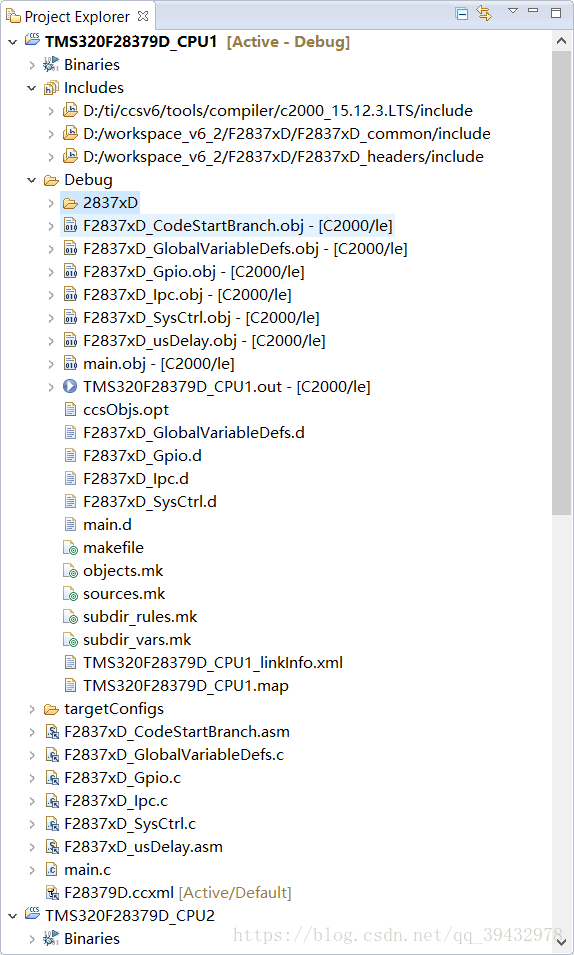
7.然后我们需要在头文件中使用的几个文件中链接,右键工程文件夹->Add Files...选择要添加的文件
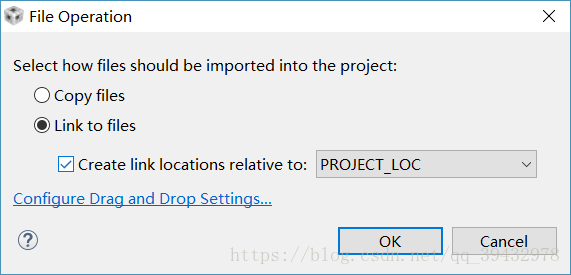
选择Link的方式就可以,因为TI的代码源文件是项目间共用的,Link不会修改这些文件。 以下是要添加的文件:
F2837xD_headersn\source\F2837xD_GlobalVariableDefs.c
F2837xD_common\source\F2837xD_CodeStartBranch.asm
F2837xD_common\source\F2837xD_usDelay.asm
F2837xD_common\source\F2837xD_SysCtrl.c
F2837xD_common\source\F2837xD_Gpio.c
F2837xD_common\source\F2837xD_Ipc.c
8.右键工程文件夹->New->Source File,命名为main.c,然后将以下代码复制到刚建的文件中,保存
/*
 * main.c
 *
 *  Created on: 2018年8月10日
 *      Author: Limerrence
 */
#include "F28x_Project.h"
void main(void)
{
	uint32_t delay;
	InitSysCtrl();
	// Set pin direction
	EALLOW;
	GpioCtrlRegs.GPADIR.bit.GPIO31 = 1;
	EDIS;
	GPIO_SetupPinOptions(34, GPIO_OUTPUT, GPIO_PUSHPULL);
	GPIO_SetupPinMux(34, GPIO_MUX_CPU2, 0);
	// turn off LED
	GpioDataRegs.GPADAT.bit.GPIO31 = 1;
	while(1)
	{
		// Turn on LED
		GpioDataRegs.GPADAT.bit.GPIO31 = 0;
		// Delay for a bit.
		for(delay = 0; delay < 2000000; delay++)
		{
		}
		// Turn off LED
		GpioDataRegs.GPADAT.bit.GPIO31 = 1;
		// Delay for a bit.
		for(delay = 0; delay < 2000000; delay++)
		{
		}
	}
}
到此CPU1的工程就建好了,接下来是CPU2的工程,和CPU1工程的建立是基本一样的
1.File -> New -> CCS Project,当然名字不一样
2.
3.
4.
5.
6.
7.如图,然后OK
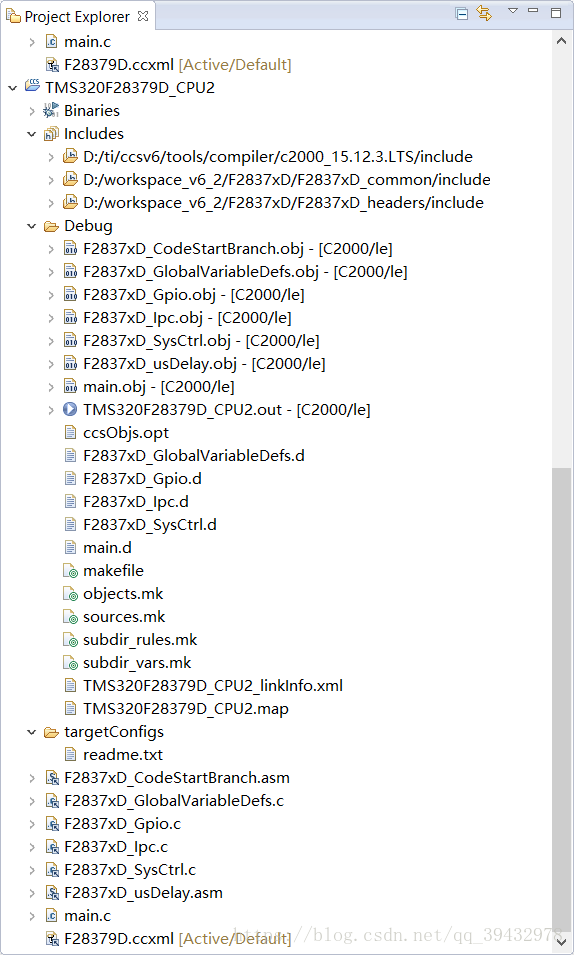
8. 添加文件,和CPU1工程第7步一样
9.新建一个main.c文件,将以下代码复制粘贴,然后保存
/*
* main.c
*
* Created on: 2018年8月10日
* Author: Limerrence
*/
#include "F28x_Project.h"
void main(void)
{
uint32_t delay;
// turn off LED
GpioDataRegs.GPBDAT.bit.GPIO34 = 1;
while(1)
{
// Turn on LED
GpioDataRegs.GPBDAT.bit.GPIO34 = 0;
// Delay for a bit.
for(delay = 0; delay < 2000000; delay++)
{
}
// Turn off LED
GpioDataRegs.GPBDAT.bit.GPIO34 = 1;
// Delay for a bit.
for(delay = 0; delay < 2000000; delay++)
{
}
}
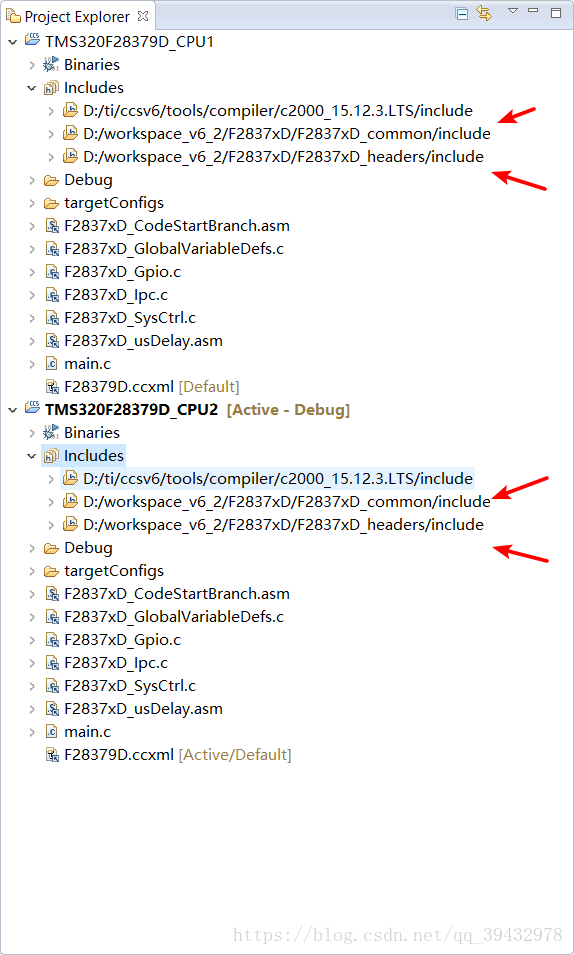
}最后添加完文件应该是这样的
两个工程都建好了,然后开始debug,连接LAUNCHXLF28379D,电脑会自动安装驱动
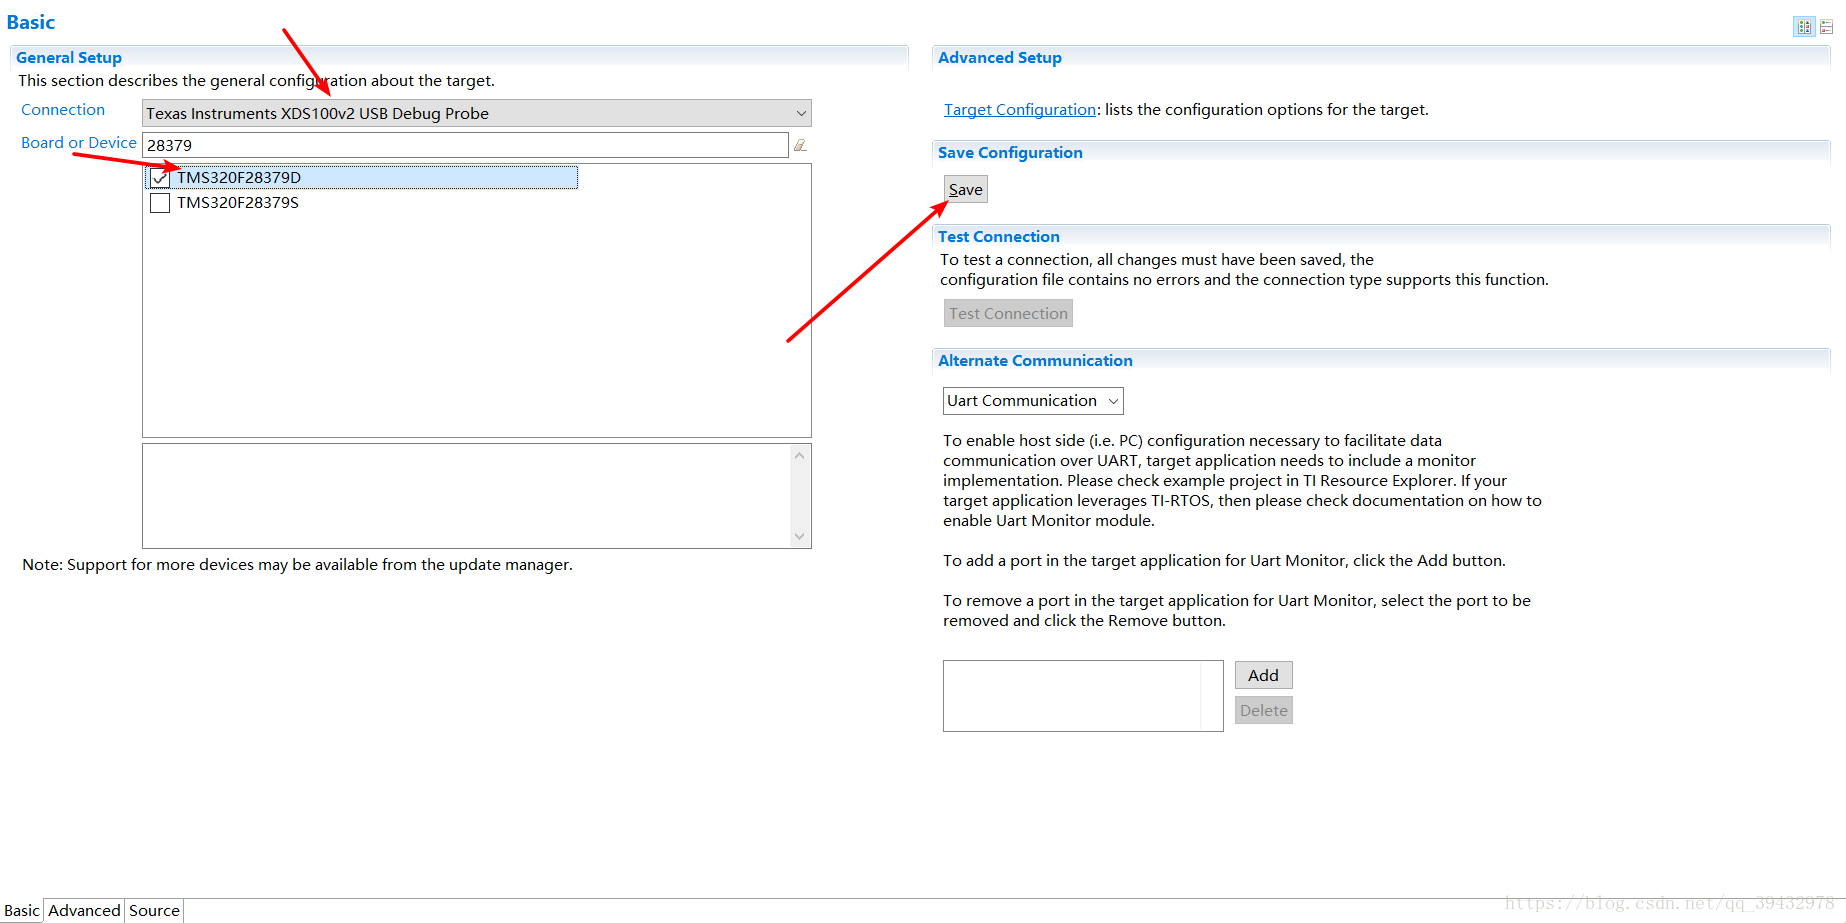
1.接下来要做的就是创建一个新的目标配置,File -> New -> Target Configuration,命名为F2837xD_xds100.ccxml,
2.Import Example Project,File -> Import->C/C++->CCS Project
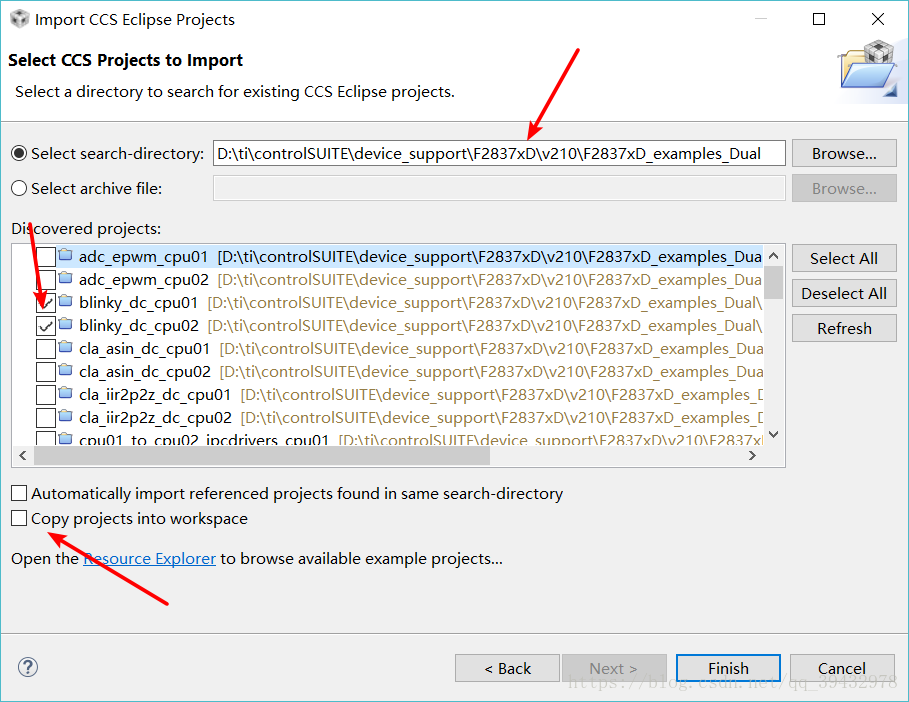
注意文件夹所在路径和勾选内容,Do not select "Copy projects into workspace". These projects link to external
resources relatively, so taking them out of controlSUITE will break the project.Click Finish
3.Build each of the example projects. Right click on each project title and select build project.
4.View->Target Configurations,Link to the two projects you had just built
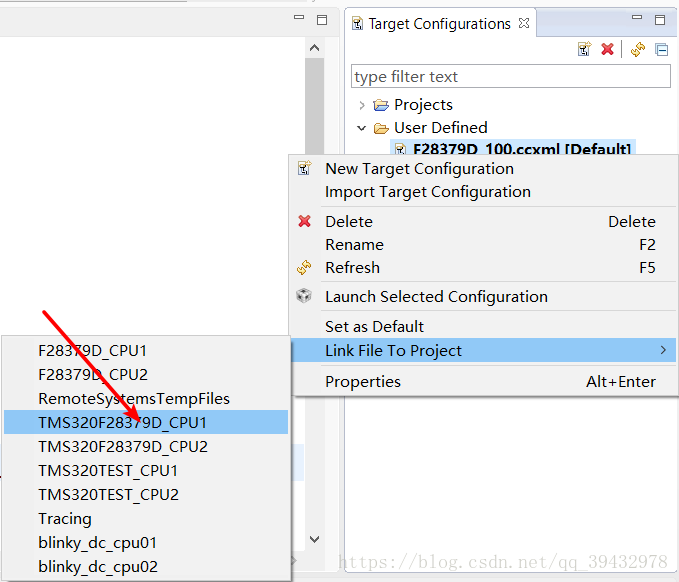
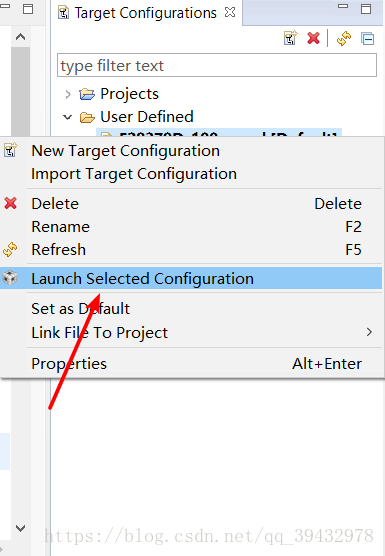
5.下面就可以Launch了
6.

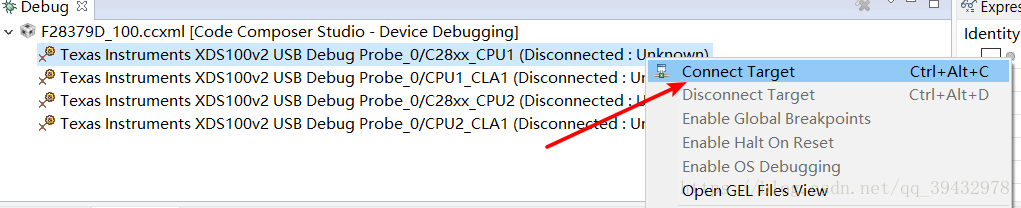
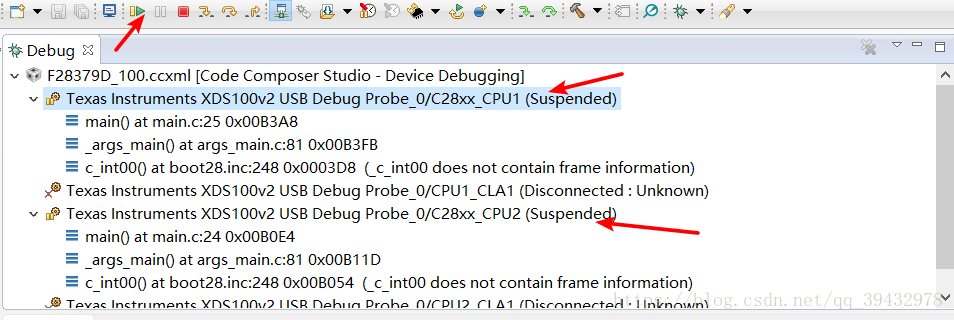
7.Connect to the device. Right click on each core in the debug window and select "Connect
Target.
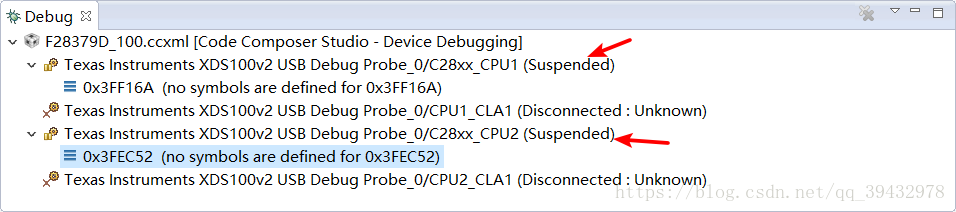
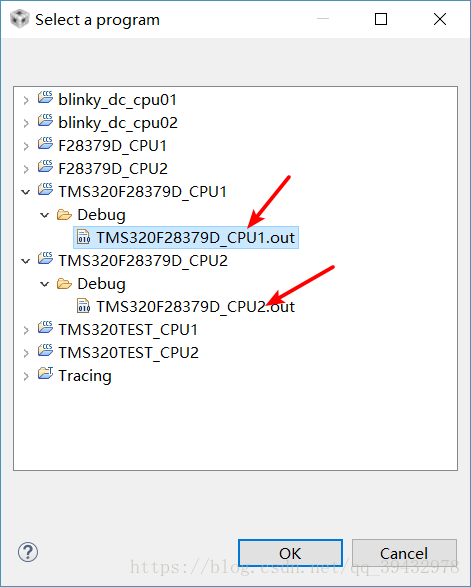
8.Load code on each of the cores. Select one of the cores in the debug window and then click
Run->Load-> Load Program.Select the Correct .out Flie.
最后一步,分别选中两个CPU分别运行,再然后就看到灯闪了
注意,文档中main.c文件中的GPIO10和GPIO14在LAUNCHXL中对应的分别是76和74引脚,在这里我改成GPIO31和GPIO34,分别对应着LAUNCHXL上的蓝灯和红灯
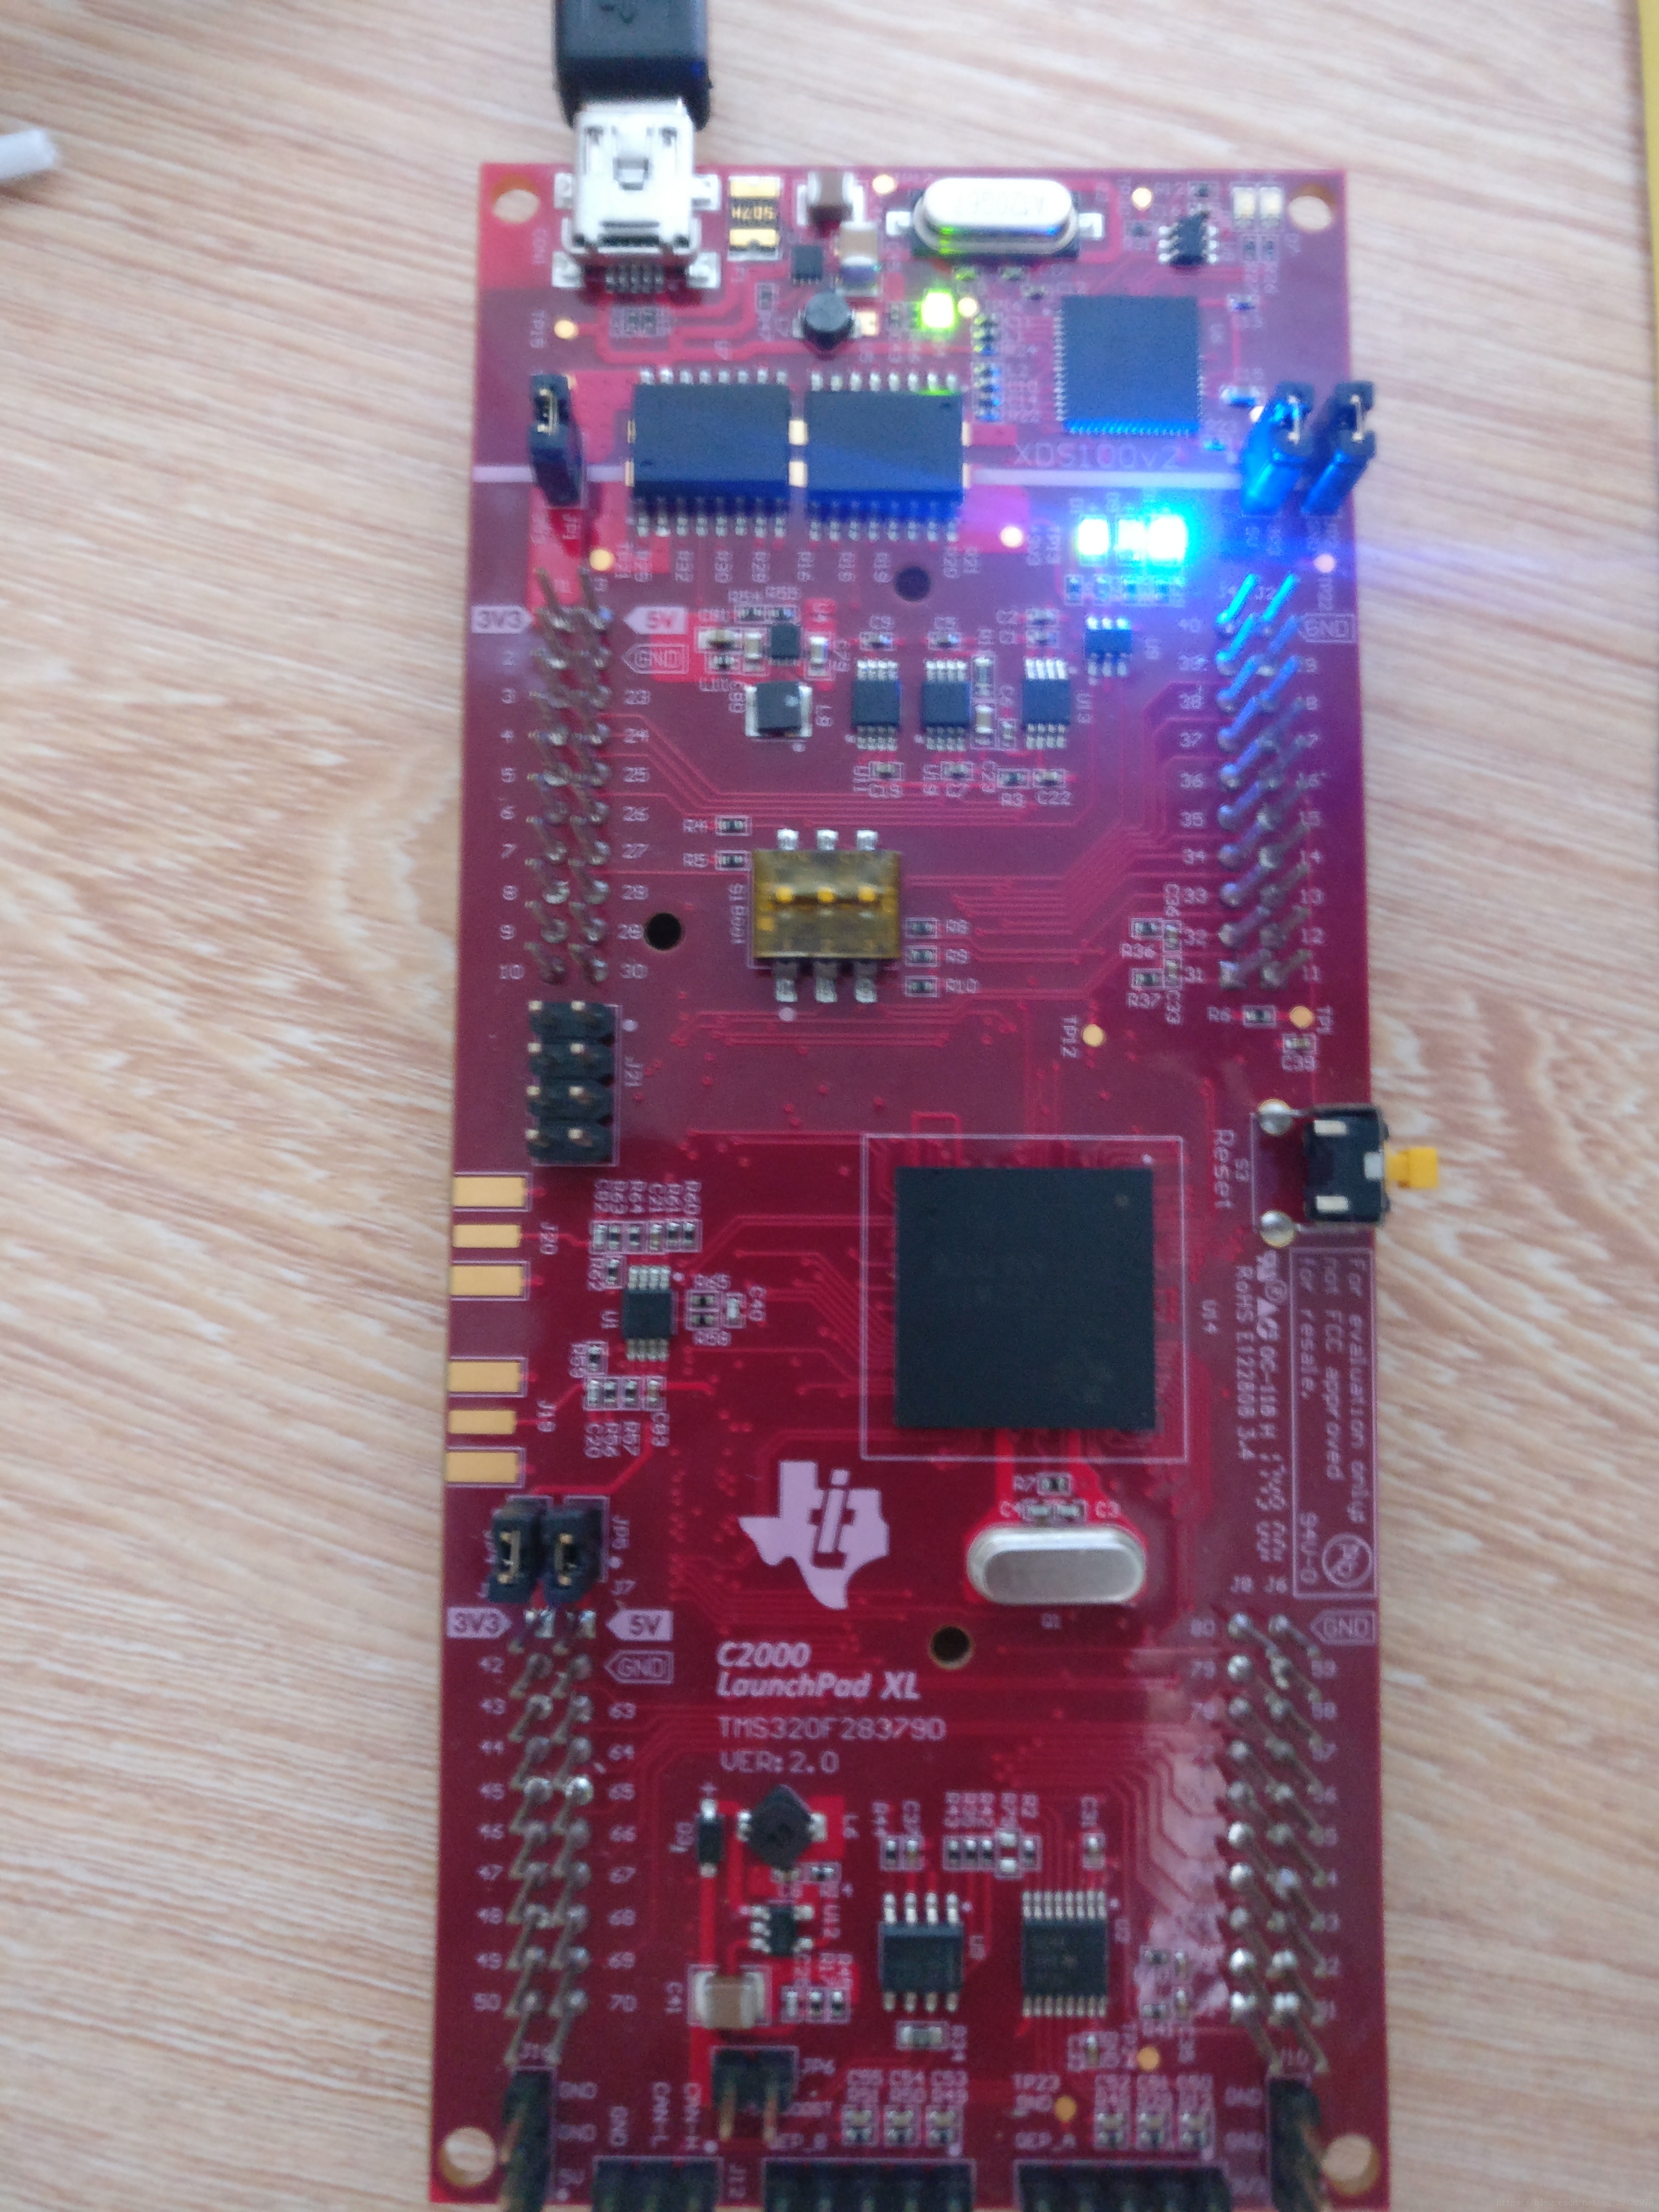
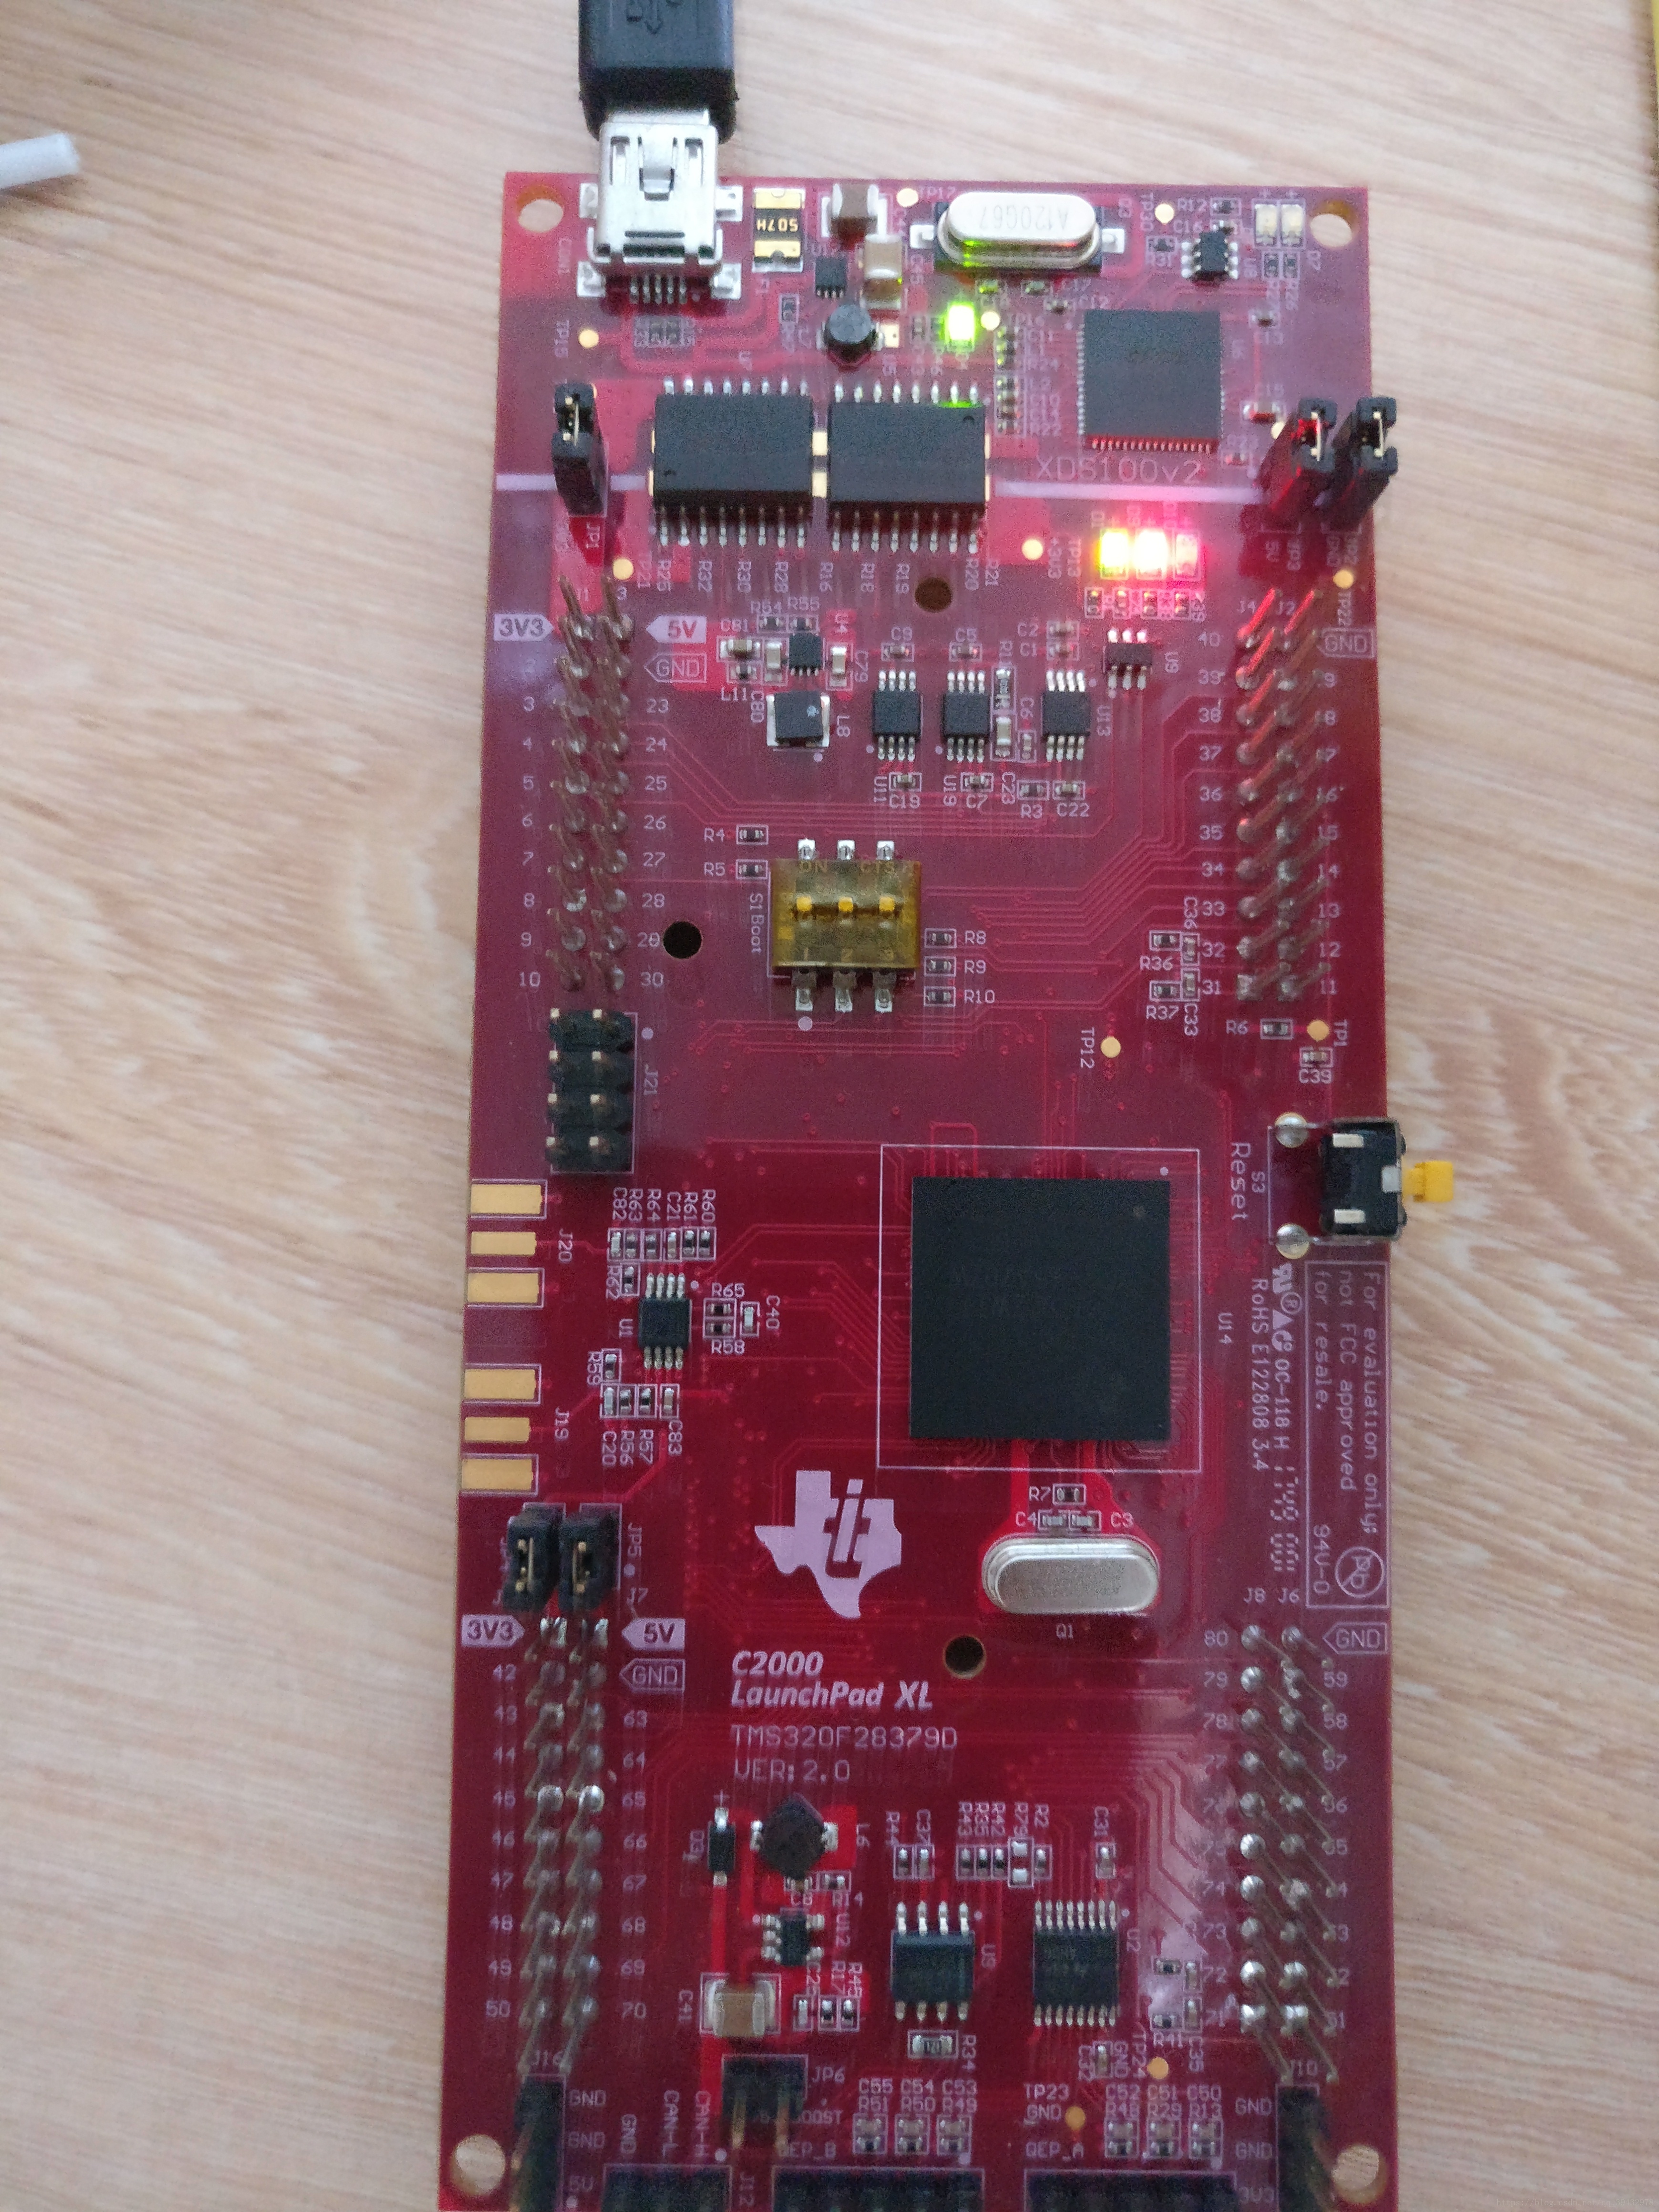
光线问题,看的不是很清楚。。。。。。
以上只是RAM调试,掉电之后程序就没有了,要想将程序写到flash里面,只需要将对应的ram.cmd文件换成对应的flash.cmd文件就行了