This thread has been locked.

If you have a related question, please click the "Ask a related question" button in the top right corner. The newly created question will be automatically linked to this question.

BOOST-DRV8711: 关于drv8711 boost仿真软件gui的安装问题

Part Number: BOOST-DRV8711
Other Parts Discussed in Thread: DRV8711, , UNIFLASH, MSP430G2553

关于drv8711 boost仿真软件gui的安装问题  

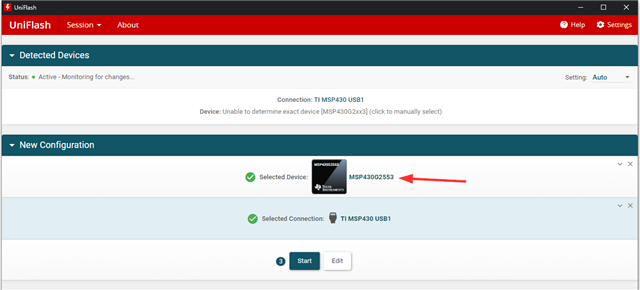
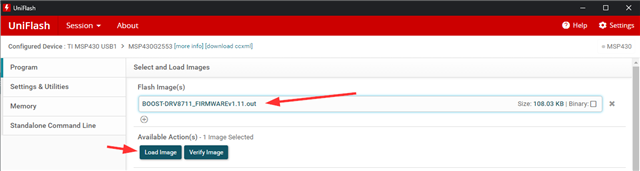
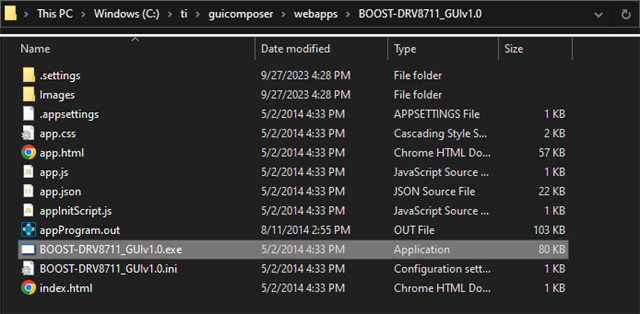
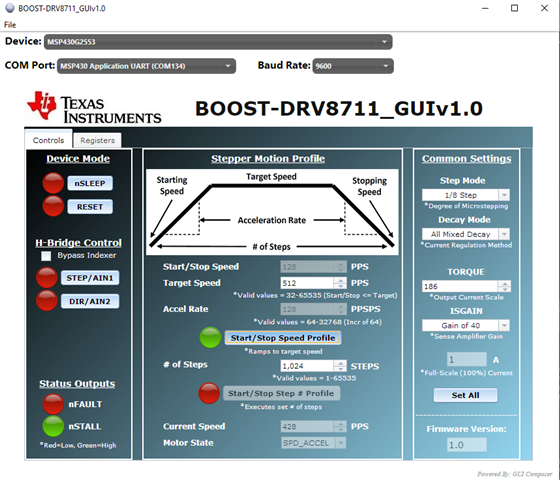
Download the latest version of the GUI Composer Runtime to initially run the BOOST-DRV8711 GUI.
You must register for a TI account if you don’t already have one. Select the appropriate version for
your operating system and follow the install instructions.
http://processors.wiki.ti.com/index.php/Category:GUI_Composer#GUI_Composer_Downloads

这个网址打不开

  • 请您尝试使用 GUI 亲自尝试这些步骤。

    固件刷新到 MSP430 启动板上:

    1. 安装TI tool UNIFLASH https://www.ti.com/tool/UNIFLASH#downloads

    2. 打开 UNIFLASH,插入 MSP-EXP430G2,输入“MSP430G2553”作为器件名称,选择 On-Chip 版本。

    3. 选择连接列表中的第一个条目,应为“TI MSP430 USB1”或类似条目。

    4. 点击“Start"

    5. 浏览到固件文件 - 从BOOST-DRV8711 页面下载hardware and software files后,应为文件夹“...\slvc575b\BOOST-DRV8711 Hardware and Software Files\Application\BOOST-DRV8711_FIRMWAREv1.11\Debug\”中的 BOOST-DRV8711_FIRMWAREv1.11.out

    6. 单击Load Image 这应该成功地将 BOOST-DRV8711 固件刷新到启动板上

    GUI Composer Runtime V1安装:

    1. 从此处下载并安装 GUI Composer v1 Runtime 版本 6.2.0.1:https://software-dl.ti.com/ccs/esd/documents/gc_downloads_v1runtime.html

    2. 将整个 BOOST-DRV8711_GUIv1.0 文件夹移动到“C:\ti\guicomposer\webapps\BOOST-DRV8711_GUIv1.0”。如果 webapps 文件夹不存在,则创建它。 并且不要运行它。

    3. 

    Serial Port FIFO设置:

    1. 打开 Windows 设备管理器。 扩展端口(COM 和 LPT)

    2. 选择 MSP430 器件 - 名称应该为“MSP430 Application UART (COM###”)。右键单击它并选择属性,转到端口设置,高级

    a. 

    3. 禁用Use FIFO buffers。 单击“确定”,“确定”。

    a. 

    Hardware设置

    1. 旋转下图右上角黑框内圈出的 RX/TX 上的 2 个接头连接器。 让它们与图像匹配

    2. 

    3. 连接并打开 EVM 电源

    最终,运行 BOOST-DRV8711_GUIv1.0.exe 文件。给它几分钟时间进行设置。