This thread has been locked.

If you have a related question, please click the "Ask a related question" button in the top right corner. The newly created question will be automatically linked to this question.

J721EXCPXEVM: Follow Fast Processor SDK Linux for J721e 09_01_00 Run the program according to the run script in the Quick Start Guide, always fails at the last step of file replacement

Part Number: J721EXCPXEVM

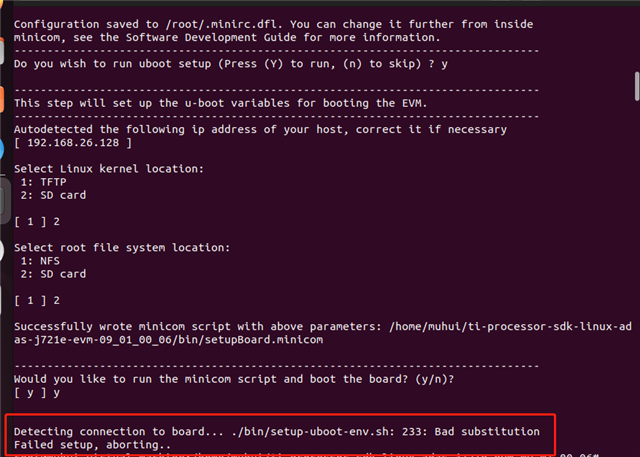
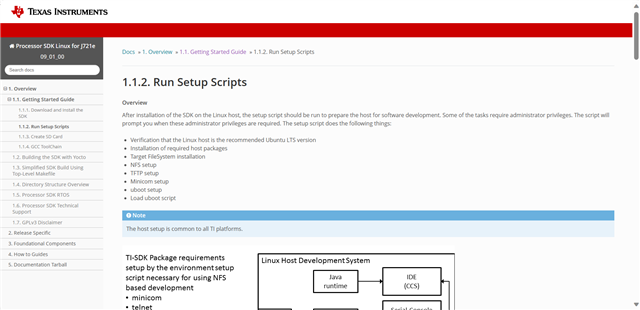
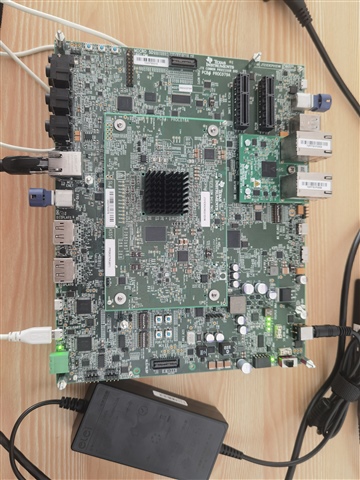
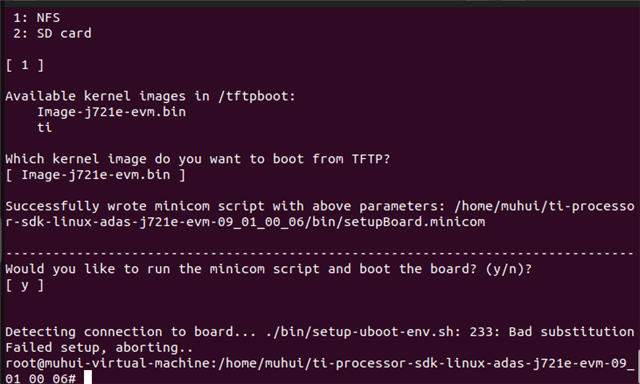
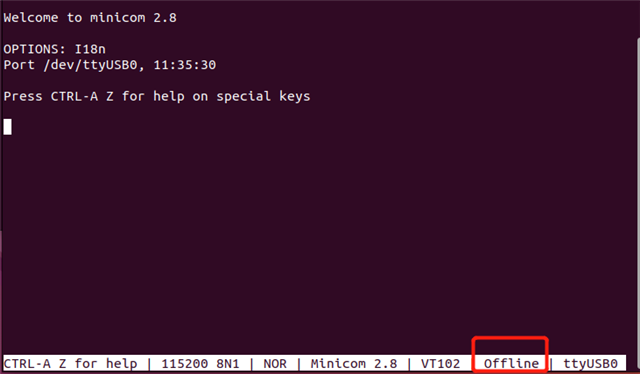
I am using Processor SDK Linux for J721e09_01_00 and running the install script according to its Getting Started guide, but I get the following replacement failure error. I am using USB for hardware and linux in the VM for connection.The second image is the getting started guide that I viewed

  • Hi,

    It is recommended to check file integrity

    Regards,

    Gary

  • Hello,Gary

        I checked the file configuration and it should be fine, but it still doesn't work. Then I uninstalled the software and reinstalled it in for it, and it still doesn't work either. I'm still using the USB to serial connection, and it's baud rate is 115200 by default in liunx, no parity, and 1 stop bit. I've followed the instructions to the letter softwaredl.ti.com/.../Run_Setup_ Scripts.html
    Here are some pictures about the hardware connection, the error in Liunx is the same as yesterday.

  • Hello,Gary

         The graphic I get into minicom in linux is shown below, it shows below that it's offline, I'm not sure how to do this, and the previous question was not solved.

  • 1. Check Physical Connections:
    Ensure that all hardware connections are secure and correct.
    Confirm that there are no loose connections or damaged cables.

    2. Verify USB to Serial Connection:
    Ensure that the USB to serial connection is functioning correctly.
    Check if the USB to serial converter requires any specific drivers.

    3. Baud Rate and Serial Settings:
    Confirm that the baud rate, no parity, and 1 stop bit settings are correctly configured on both ends (Linux and the J721EXCPXEVM).
    Check if there are any specific serial port settings required for your setup.

    4. Logs and Error Messages:
    Examine any error messages you receive in Linux. They might provide clues about the nature of the problem.
    Check system logs (`dmesg`, `/var/log/messages`, etc.) for any information related to the USB to serial connection.

  • 1. Check Power and Connection:
    Ensure that the J721EXCPXEVM is powered on and that all connections are secure.
    Confirm that the USB to serial connection is correctly established.

    2. Minicom Configuration:
    Open Minicom with the following command (replace `/dev/ttyUSB0` with your actual serial port):

    sudo minicom -D /dev/ttyUSB0 -b 115200

    Once in Minicom, press `CTRL-A` followed by `O` to access the Minicom configuration menu.
    Navigate to "Serial port setup" and verify that the settings match your configuration (115200 baud rate, no parity, 1 stop bit).

    3. Reboot the J721EXCPXEVM:
    Sometimes, a simple reboot of the hardware can resolve connectivity issues.

    4. Check Device Permissions:
    Ensure that your user has the necessary permissions to access the serial port. You can add your user to the `dialout` group using the following command:

    sudo adduser $USER dialout

    5. Verify Port Availability:
    Confirm that the serial port (`/dev/ttyUSB0` or the correct port) is available and not being used by another process.

    6. Try a Different Terminal Emulator:
    If the issue persists, try using a different terminal emulator like `screen` or `picocom` to connect to the serial port.

    screen /dev/ttyUSB0 115200

    or
    picocom -b 115200 /dev/ttyUSB0


    7. Check Udev Rules:
    Confirm that there are no conflicting or incorrect udev rules for the USB to serial converter. Check the rules in `/etc/udev/rules.d/` to make sure they are appropriate for your device.