

Other Parts Discussed in Thread: UNIFLASH
请注意,本文内容源自机器翻译,可能存在语法或其它翻译错误,仅供参考。如需获取准确内容,请参阅链接中的英语原文或自行翻译。
器件型号:AM2612Thread 中讨论的其他器件:UNIFLASH
在 LP-AM261x 上运行 Profinet 示例的分步指南。
要求:
1.INDcomms SDK
7. LP-AM261x
确保已安装上述要求。 请按照以下链接/步骤设置工具:
安装 requirements.txt 中提到的所有要求(位置 — ind_comms_sdk/mcu_plus_sdk/requirements.txt)
/*Navigate to mcu_plus_sdk folder and then run the following command*/
pip install -r requirements.txt
运行 Profinet 示例的步骤:
概述 — AM261x-LP 上的 Profinet 演示支持从外部闪存(即 XIP)执行。 因此、为了正确运行示例、我们需要使用 Uniflash 工具将 sbl_ospi_mcelf 和应用程序映像 (.mcelf) 编程到闪存中、然后将引导模式设置为 OSPI、然后我们可以看到成功运行日志。 请按照以下步骤操作:
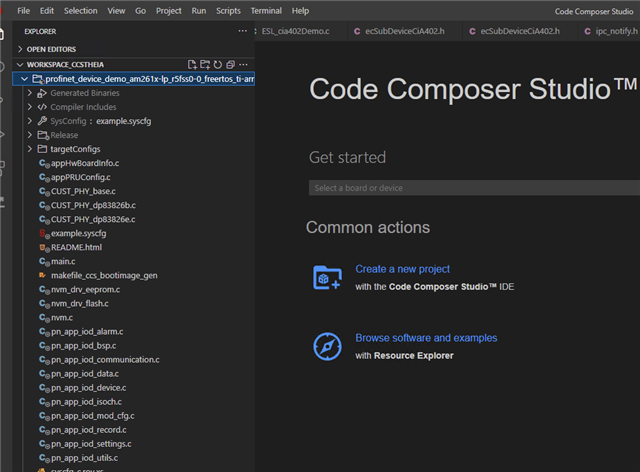
1.打开 CCS 并在 Project Explorer 中导入 Profinet 示例
2.构建工程并确保 Profinet /device_demo_am261x-lp_r5fss0-0_freertos_ti-arm-clang.mcelf 和 mcelf_xIP image i s 已正确生成、请查看下面的成功日志。 如果有任何错误,请参阅此 帖子。 [172] Boot multi-core ELF image: am261x:r5fss0-0:freertos:ti-arm-clang C:/Users/a0492123/workspace_ccstheia/profinet_device_demo_am261x-lp_r5fss0-0_freertos_ti-arm-clang/Release/profinet_device_demo_am261x-lp_r5fss0-0_freertos_ti-arm-clang.mcelf ...
[173]python C:/ti/ind_comms_sdk_am261x_10_02_00_15/mcu_plus_sdk/tools/boot/multicore-elf/genimage.py --core-img=0:Release/profinet_device_demo_am261x-lp_r5fss0-0_freertos_ti-arm-clang.out --output=C:/Users/a0492123/workspace_ccstheia/profinet_device_demo_am261x-lp_r5fss0-0_freertos_ti-arm-clang/Release/profinet_device_demo_am261x-lp_r5fss0-0_freertos_ti-arm-clang.mcelf --merge-segments=true --tolerance-limit=0 --ignore-context=false --xip=0x60000000:0x68000000 --xlat=none --max-segment-size=8192
[174] Boot multi-core ELF image: C:/Users/a0492123/workspace_ccstheia/profinet_device_demo_am261x-lp_r5fss0-0_freertos_ti-arm-clang/Release/profinet_device_demo_am261x-lp_r5fss0-0_freertos_ti-arm-clang.mcelf Done !!!
[175] .
[176] Boot image: am261x:r5fss0-0:freertos:ti-arm-clang C:/Users/a0492123/workspace_ccstheia/profinet_device_demo_am261x-lp_r5fss0-0_freertos_ti-arm-clang/Release/profinet_device_demo_am261x-lp_r5fss0-0_freertos_ti-arm-clang.appimage Done !!!
[177] .

3.将 LP-AM261x 置于 设备引导模式。然后、打开 Uniflash GUI 工具、选择
SBL - sbl_ospi_multiple_elf.release.tiimage(位置 — ind_comms_sdk/mcu_plus_sdk/tools/boot/sbl_prebuilt/am261x-LP)
Application“ Profinet /device_demo_am261x-lp_r5fss0-0_freertos_ti-arm-clang.mcelf(位置 — CCS 工作区)
XIP 映像- Profinet /device_demo_am261x-lp_r5fss0-0_freertos_ti-arm-clang.mcelf_xIP(位置 — CCS 工作区)

点击“Load Image“(加载映像)。
4.加载成功后。 断开电源线、将引导模式引脚更改为 OSPI 引导模式
5.接下来给器件上电并打开 UART COM 端口以查看 Profinet 的成功日志示例:
