请注意,本文内容源自机器翻译,可能存在语法或其它翻译错误,仅供参考。如需获取准确内容,请参阅链接中的英语原文或自行翻译。
器件型号:TM4C1294NCPDT Thread 中讨论的其他器件:EK-TM4C1294XL
工具与软件:
您好!
我可能在 PLL 方面有问题。
在对定制电路板进行开关循环通电时、我发现了这个问题。
问题非常罕见、 仅每100...4000个周期发生一次。
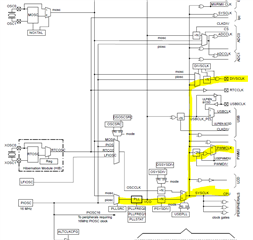
该电路板使用25MHz 晶体、我们设置 PLL 以生成120MHz 系统时钟。
此外、我们使用时钟输出引脚(PQ4)生成8.33MHz 时钟(PF1/3)、使用25MHz 在 PF1上生成780kHz 时钟。
此外、我们将 I2C 用于某些传感器数据。
失败时、我们可以看到:
- PQ4 8.33MHz ->良好
- PWM 时钟~48kHz ->错误
- I2C 时钟~3kHz ->错误
-延迟时间比预期时间长->不好
我们使用了旧的 TivaWare、但将其更新为最新(2.2.0.295)、即 SYSCLT#22和 SYSCTL#23的原因。
我只能在这里发布代码块。
以下是我的代码。 有什么想法如何实现这一点吗?
// The system clock frequency.
uint32_t g_ui32SysClock;

int main(void)
{
    ///////////////////////////////////////////////////////////////////////////
    // Initialization
    ///////////////////////////////////////////////////////////////////////////

    g_ui32SysClock = init_CPU();
    init_CLKOut();
    init_M0PWM1_MC();

    // more code
    ...
    ...
    ...
}

uint32_t init_CPU(void)
{
    uint32_t ui32SysClock;

    //
    // Make sure the main oscillator is enabled because this is required by
    // the PHY.  The system must have a 25MHz crystal attached to the OSC
    // pins.  The SYSCTL_MOSC_HIGHFREQ parameter is used when the crystal
    // frequency is 10MHz or higher.
    //
    MAP_SysCtlMOSCConfigSet(SYSCTL_MOSC_HIGHFREQ);

    // Run from the PLL at 120 MHz.
    // Note: SYSCTL_CFG_VCO_240 is a new setting provided in TivaWare 2.2.x and
    // later to better reflect the actual VCO speed due to SYSCTL#22.
    //
    ui32SysClock = MAP_SysCtlClockFreqSet((SYSCTL_XTAL_25MHZ |
                                           SYSCTL_OSC_MAIN |
                                           SYSCTL_USE_PLL |
                                           SYSCTL_CFG_VCO_240), 120000000);

    return(ui32SysClock);
}

void init_CLKOut(void)
{
    //
    // Enable pin PQ4 for CLK-Output for FPGA
    // use the Main Oscillator (MOSC) = 25MHz and divided by 3
    // 25MHz / 3 = 8.333MHz
    // CLK-Output is enabled
    //
    MAP_SysCtlPeripheralEnable(SYSCTL_PERIPH_GPIOQ);

    //
    // Wait for the GPIOQ module to be ready.
    //
    while(!MAP_SysCtlPeripheralReady(SYSCTL_PERIPH_GPIOQ))
    {
    }

    MAP_GPIOPinConfigure(GPIO_PQ4_DIVSCLK);
    GPIOPinTypeDIVSCLK(GPIO_PORTQ_BASE, GPIO_PIN_4);
    MAP_SysCtlClockOutConfig(SYSCTL_CLKOUT_EN | SYSCTL_CLKOUT_MOSC, 3);
}

void init_M0PWM1_MC(void)
{
    //
    // Enable M0PWM1
    //
    MAP_SysCtlPeripheralEnable(SYSCTL_PERIPH_PWM0);

    //
    // Wait for the PWM0 module to be ready.
    //
    while(!MAP_SysCtlPeripheralReady(SYSCTL_PERIPH_PWM0))
    {
    }

    //
    // Set the PWM clock source to the system clock divided by 1.
    // 120MHz / 1 = 120MHz
    //
    MAP_PWMClockSet(PWM0_BASE, PWM_SYSCLK_DIV_1);

    //
    // Enable GPIO-F
    //
    MAP_SysCtlPeripheralEnable(SYSCTL_PERIPH_GPIOF);

    //
    // Wait for the GPIO module to be ready.
    //
    while(!MAP_SysCtlPeripheralReady(SYSCTL_PERIPH_GPIOF))
    {
    }

    //
    // Configure the GPIO pin muxing to select M0PWM1 functions for these pins.
    // This step selects which alternate function is available for these pins.
    // This is necessary if your part supports GPIO pin function muxing.
    // Consult the data sheet to see which functions are allocated per pin.
    //
    MAP_GPIOPinConfigure(GPIO_PF1_M0PWM1);

    //
    // Configure the PWM function for PF1.
    // Consult the data sheet to see which functions are allocated per pin.
    //
    MAP_GPIOPinTypePWM(GPIO_PORTF_BASE, GPIO_PIN_1);

    //
    // Configure the M0PWM to count up/down without synchronization.
    //
    MAP_PWMGenConfigure(PWM0_BASE, PWM_GEN_0, PWM_GEN_MODE_UP_DOWN |
                        PWM_GEN_MODE_NO_SYNC);

    //
    // Set the PWM period to 780kHz.  To calculate the appropriate parameter
    // use the following equation: N = (1 / f) * SysClk.  Where N is the
    // function parameter, f is the desired frequency, and SysClk is the
    // system clock frequency.
    // In this case you get: (1 / 780kHz) * (120MHz/1) = 154 cycles.  Note that
    // the maximum period you can set is 2^16.
    //
    MAP_PWMGenPeriodSet(PWM0_BASE, PWM_GEN_0, 154);

    //
    // Set PWM0 to a duty cycle of 50%.  You set the duty cycle as a function
    // of the period.  Since the period was set above, you can use the
    // PWMGenPeriodGet() function.  For this example the PWM will be high for
    // 50% of the time or 77 clock ticks (154 / 2).
    //
    MAP_PWMPulseWidthSet(PWM0_BASE, PWM_OUT_1, 77);

    //
    // Disables (false) the PWM0 Bit1 (PF1) output signal.
    //
    MAP_PWMOutputState(PWM0_BASE, PWM_OUT_1_BIT, false);

    //
    // Enables the timer/counter for a PWM generator block.
    //
    MAP_PWMGenEnable(PWM0_BASE, PWM_GEN_0);
}