请注意,本文内容源自机器翻译,可能存在语法或其它翻译错误,仅供参考。如需获取准确内容,请参阅链接中的英语原文或自行翻译。
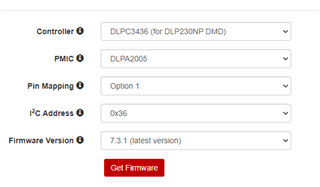
部件号:DLPDLCR230NPEVM 在“线程: DLPC3436”中讨论的其他部件
您好,TI团队:
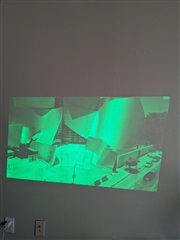
我们刚刚开始使用DLPDLCR230NPEVM,并通过运行python脚本开始工作。 sample02_splash.py工作起来非常出色-所有的色彩都是鲜艳明亮的。 但是,一旦我们尝试显示Raspberry PI桌面或来自RPI的.mp4,图像将全部显示为绿色。 当直接从RPI显示时,似乎只有绿色LED才会激活。 原因可能是什么?
正如我所提到的,所有LED都已激活,用于"闪屏"示例。 但是,对于其他几个python示例脚本,红色和蓝色LED未激活。 例如,当显示“白色”时,“sample01_TPG.py”将显示全绿色屏幕。 大多数显示测试仅显示绿色,或者在要显示红色或蓝色时显示黑色。 值得注意的是,"执行器"测试似乎显示正确,每个像素内显示所有颜色(RGB)。 另外值得注意的是,运行sample03_display.py时,"循环图像幕帘设置"的所有测试颜色都正确。 RGB,青色,品红色等全部填充屏幕。 最后,运行sample05_led.py时,红色和蓝色测试确实有可见光,只是没有像绿色测试那样充满屏幕的任何部分,可见的内容令人难以置信地暗。
流程和背景:
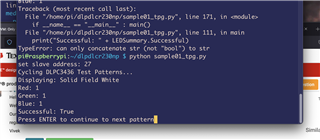
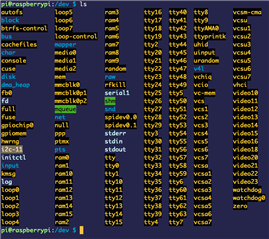
在我们的安装中,我们用随python API提供的示例config.txt替换了/boot中的config.txt。 所做的唯一更改是将i2c.py中的default_slaver_address值从7更改为11,以匹配/dev中的i2c设备。 此更改是在按照手册中的说明运行"init_parallet_mode.py"后进行的,并遇到了与错误的i2c地址有关的错误。 "没有这样的文件或目录:'/dev/i2c-7'。" 通过更改此值修复了错误。 所有脚本都将运行,但在许多脚本中,红色和蓝色未激活。
我们确实打算使用Raspberry Pi Zero W 2代替4B+,但是我们已经使用Zero和4B+进行了测试,绿色LED问题仍然完全相同(我们只需更换microSD卡)。 RPI Zero W 2通过焊接包容式管座连接,4B+通过EVM提供的管座连接器连接。
我们确实打算使用Raspberry Pi Zero W 2代替4B+,但是我们已经使用Zero和4B+进行了测试,绿色LED问题仍然完全相同(我们只需更换microSD卡)。 RPI Zero W 2通过焊接包容式管座连接,4B+通过EVM提供的管座连接器连接。
指示灯:
D_Done和D_INI_B_LED指示灯亮起,D_HOST_IRQ指示灯熄灭。
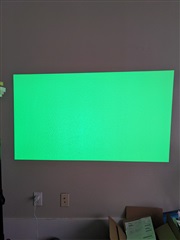
所有颜色的闪屏显示示例:
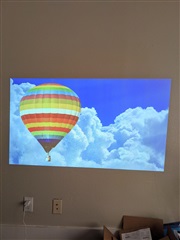
所有颜色的闪屏显示示例:
使用mplayer播放的视频:
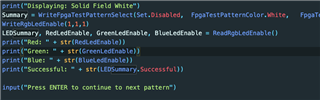
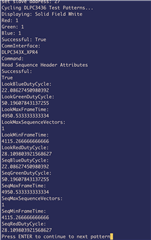
示例01 -"显示:实线野白色":
"执行器测试模式"
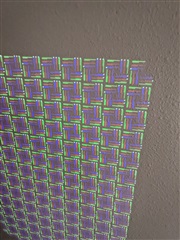
示例01 -"显示:实线野白色":
"执行器测试模式"
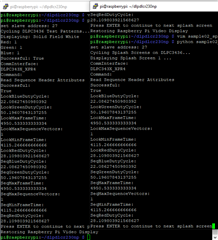
状态寄存器的输出:
config.txt:
config.txt:
# For more options and information see
# http://rpf.io/configtxt
# Some settings may impact device functionality. See link above for details

# #########################################
# DO NOT MODIFY THE LINES BELOW THIS POINT
# #########################################

# uncomment if you get no picture on HDMI for a default "safe" mode
#hdmi_safe=1

# uncomment this if your display has a black border of unused pixels visible
# and your display can output without overscan
disable_overscan=1

# uncomment the following to adjust overscan. Use positive numbers if console
# goes off screen, and negative if there is too much border
#overscan_left=16
#overscan_right=16
#overscan_top=16
#overscan_bottom=16

# uncomment to force a console size. By default it will be display's size minus
# overscan.
#framebuffer_width=1280
#framebuffer_height=720

# uncomment if hdmi display is not detected and composite is being output
hdmi_force_hotplug=1

# uncomment to force a specific HDMI mode (this will force VGA)
hdmi_group=2
hdmi_mode=82

# uncomment to force a HDMI mode rather than DVI. This can make audio work in
# DMT (computer monitor) modes
#hdmi_drive=2

# uncomment to increase signal to HDMI, if you have interference, blanking, or
# no display
config_hdmi_boost=4

# uncomment for composite PAL
#sdtv_mode=2

#uncomment to overclock the arm. 700 MHz is the default.
#arm_freq=800

# Additional overlays and parameters are documented /boot/overlays/README

# Enable audio (loads snd_bcm2835)
dtparam=audio=on

# Uncomment this to enable infrared communication.
#dtoverlay=gpio-ir,gpio_pin=17
#dtoverlay=gpio-ir-tx,gpio_pin=18

# #########################################
# DO NOT MODIFY THE LINES ABOVE THIS POINT
# #########################################

# Uncomment some or all of these to enable the optional hardware interfaces
#dtparam=i2c_arm=on
#dtparam=i2s=on
dtparam=spi=on

# Configure Raspberry PI for SSH over USB
dtoverlay=dwc2

# Configure I2C on GPIO Pins #22 and #23
dtoverlay=i2c-gpio,i2c-gpio_sda=23,i2c_gpio_scl=22,i2c_gpio_delay_us=2

# Configure DPI on GPIO Pins #0 through #21
gpio=0=op
gpio=0=pn
gpio=1-27=ip
gpio=1-27=pn

# Enable DPI18 Overlay
enable_dpi_lcd=1
display_default_lcd=1
dpi_group=2
dpi_mode=87

# Configure DPI Video Timings
# RGB 666 CFG 1 (MODE 5)
dpi_output_format=458773

# 58 Hz Timings (Low-End Spec)
# Works at GPIO DRIVE 5-7
hdmi_timings=1920 0 20 10 10 1080 0 10 10 10 0 0 0 58 0 125000000 3

# NOTE: GPIO PINS #24 - #27 ARE DRIVEN SEPARATELY BY WiringPi SOFTWARE

[pi4]
# Enable DRM VC4 V3D driver on top of the dispmanx display stack
#dtoverlay=vc4-fkms-v3d
#max_framebuffers=2

[all]
#dtoverlay=vc4-fkms-v3d
我们使用的电源来自Canakit 5.1V 3.5A,该电源在EVM用户手册中列出的建议范围内。 此外,据我所能理解,这并不能解释为什么在静态图片中显示颜色,而不是RPI界面。
在另一个不太重要的注释中,'omxplayer'命令给了我们一个开箱即用的错误。 目前已对此进行了有限的故障诊断。 现在我们使用mplayer,它运行的是.mp4,但同样没有红色和蓝色。 如果您对问题有任何了解,我们将感谢您提供指导。
感谢您的帮助,
Andrew
Andrew