This thread has been locked.
If you have a related question, please click the "Ask a related question" button in the top right corner. The newly created question will be automatically linked to this question.
https://e2e.ti.com/support/processors-group/processors/f/processors-forum/1302708/j784s4xevm-while-booting-the-kernel-from-ospi-nor-getting-this-error
我已在设备树中配置以下分区->
此外、我们在下面提到的地址中具有 rootfs 分区->
尊敬的 Manan: 在0x2700000地址处刷写了什么 rootfs?
https://e2e.ti.com/support/processors-group/processors/f/processors-forum/920696/faq-tda4vm-flashing-the-tiny-rootfs-image-using-uniflash-on-ospi
有许多步骤可刷写 UBIFS 文件系统。
-基尔西
是的、我 对 UBI 微型文件系统使用了0x2700000地址
我正在尝试使用 OSPI NOR 模式来刷写文件系统。
我没有使用 SDCARD、我使用 OSPI NOR 0 - 3EF0000地址来刷写所有二进制文件
下面是我在内部和外部
偏移为0x0时的 sbl_cust_img_mcu1_0_release.tiimage
tifs.bin、偏移量为0x8000
偏移量为0x100000的 boot_app_ospi_linux_mcu1_0_freertos_TestApp_release.appimage
偏移为19E0000的 stage1图像
偏移为2000000时的 stage2图像
偏移量为200000的 atf_optee.appimage
偏移为19C0000的 tidtb_linux.appimage
偏移量为2C0000时的 tikernelimage_linux.appimage
马南
您是否在使用 SDK (哪个版本?) 来生成这些图像并在 EVM 上尝试操作?
此致
卡兰
大家好、Karan、我使用的是 SDK 8.6.1.3、我正在 EVM 中进行尝试。
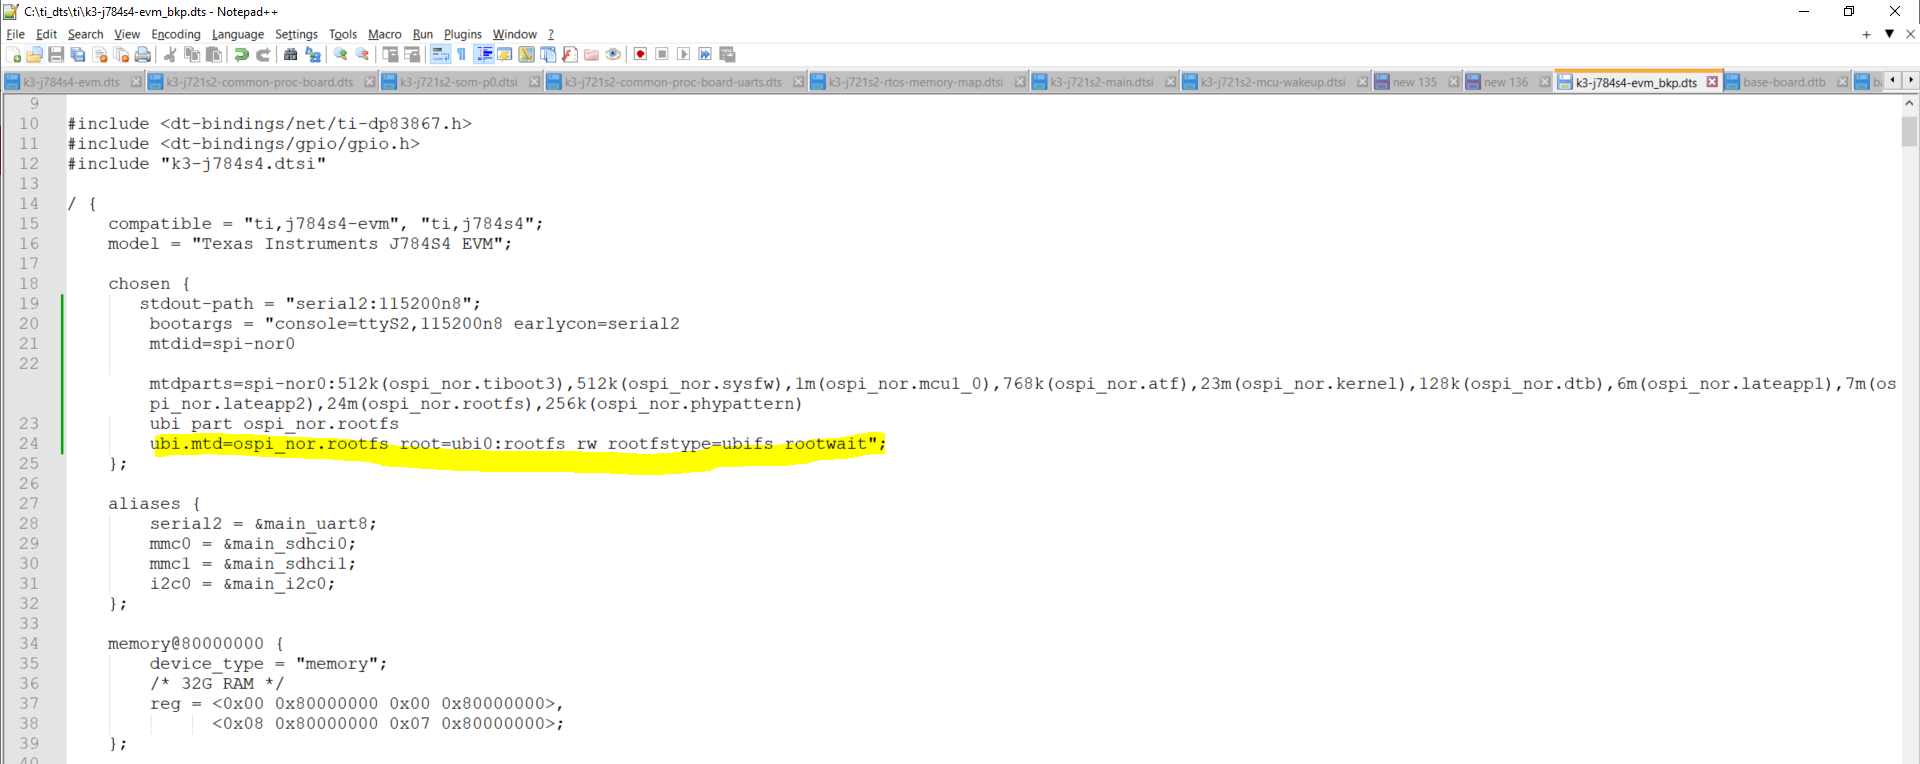
我需要配置 k3-j784s4-evm.dts、使 ubi 文件系统可以通过内核进行检测。我的意思是 rootfs 会通过内核进行检测:
如何 在器件树中设置引导参数以便从 NOR 引导内核和文件系统
我需要复制这个问题,并与团队讨论什么是缺失在 kenel 命令行,你正在通过选定的节点传递. 我想确保您已查看了下面的常见问题解答。 区别在于该常见问题解答使用 u-boot、而不是直接更新内核命令行。
将 bootargs 配置为 bootargs ="console=ttyS2115200n8 earlycon=SERIAL2 root=/dev/mtdblock8 rw rootfsttype=ubifs rootwait"后;
当我按如下方式添加分区时
提示1 (&O){ 状态="可以"; pinctrl-names ="默认"; pinctrl-0 =<&mcu_fss0_ospipi1_pines_default>
闪存@0{ 兼容="JEDEC、SPI-NOR"; 寄存器=<0x0>; SPI-TX-BUS-width =<1>; SPI-Rx-bus-width =<4>; spi-max-frequency =<40000000>; CDN、tshsl-ns =<60>; CDN、tsd2d-ns =<60>; cdns,tchsh-ns =<60>; CDN、tslch-ns =<60>; CDN、读取延迟=<2>; #address-Cells =<1>; #size-cells =<1>; 分区{ 兼容="固定分区"; #address-Cells =<1>; #size-cells =<1>;
分区@0{ label ="ospi_nor.tiboot3"; 寄存器=<0x0 0x80000>; }; 分区@80000{ label ="ospi_nor.sysfw"; 寄存器=<0x80000 0x80000> }; 分区@100000{ label ="ospi_nor.mcu1_0"; 寄存器=<0x100000 0x100000>; }; 分区@200000{ label ="ospi_nor.atf"; 寄存器=<0x200000 0xc0000>; }; 分区@2C0000{ label ="ospi_nor.kernel"; REG =<0x2C0000 0x1700000>; }; 分区@19C0000{ label ="ospi_nor.dtb"; 寄存器=<0x19C0000 0x20000>; }; 分区@19E0000{ label ="ospi_nor.lateapp1"; REG =<0x19E0000 0x620000>; }; 分区@2000000{ label ="ospi_nor.lateapp2"; REG =<0x2000000 0x700000>; }; 分区@2700000{ label ="ospi_nor.rootfs"; REG =<0x2700000 0x1200000>; }; 分区@3FE0000 { label ="ospi_nor.phypatern"; REG =<0x3FE0000 0x40000>; }; }; }; };
收到此错误->
您可以更新以上问题吗?