This thread has been locked.

If you have a related question, please click the "Ask a related question" button in the top right corner. The newly created question will be automatically linked to this question.

[参考译文] TMDS64EVM:其他 SDK 工具、dfu-util 和 Zadig 工具不符合 AM64x DFU 器件的要求。

Guru**** 2540720 points
Other Parts Discussed in Thread: TMDS64EVM, UNIFLASH

请注意,本文内容源自机器翻译,可能存在语法或其它翻译错误,仅供参考。如需获取准确内容,请参阅链接中的英语原文或自行翻译。

https://e2e.ti.com/support/processors-group/processors/f/processors-forum/1260370/tmds64evm-aditional-sdk-tools-dfu-util-and-zadig-tool-doesn-t-show-the-am64x-dfu-device

器件型号:TMDS64EVM
主题中讨论的其他器件: UNIFLASH

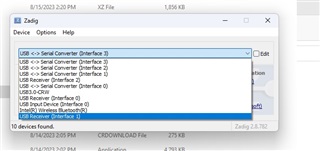
大家好、我的公司刚刚获得了 TMDS64EVM 评估模块、我们已经尝试对其进行配置、但还没成功。 具体来说、在安装 dfu-util 的步骤中、dfu-util 和 Zadig 工具都无法显示名为 AM64x DFU 的器件。  

我的计算机是 Dell Intel(R) Core(TM) i9-10900X CPU @ 3.70GHz 3.70 GHz  ,操作系统为 Windows 11 Pro。 我的另一个同事尝试它,他正在使用一个 Intel-i7 Windows 10,并被困在相同的步骤,我.  

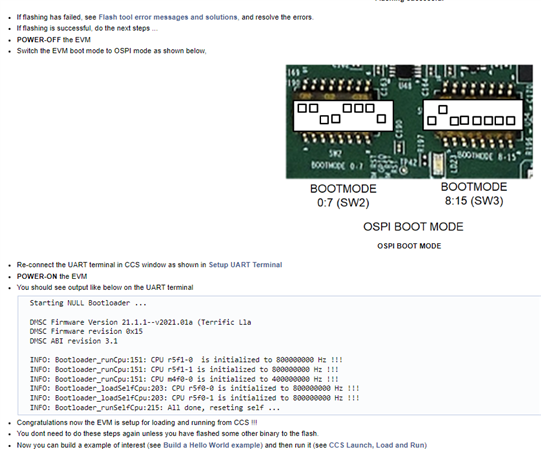
在此步骤中、引导模式为 DFU SW2为11001010、SW3为00000000。

在所有步骤中、这是一个缺失的步骤、这就是为什么我认为这就是问题所在。  

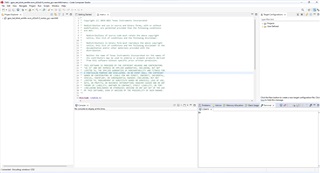
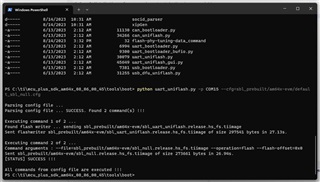
关于 code composer、我可以使用 code composer 终端与电路板进行通信、每3秒显示"C"字符。 但是、当我尝试将示例代码上传到电路板时、出现了如下错误:

连接到目标时出错:(错误-1170 @ 0x0)无法访问 DAP。 复位器件、然后重试此操作。 如果错误仍然存在、请确认配置、对电路板执行下电上电、和/或尝试更可靠的 JTAG 设置(例如、降低 TCLK)。

器件功能时钟似乎关闭。 对电路板执行下电上电。 如果错误仍然存在、请确认配置和/或尝试更可靠的 JTAG 设置(例如较低 TCLK)。

连接到目标时出错:(错误-2081 -(0:0:0))器件功能时钟似乎已关闭。

  • 请注意,本文内容源自机器翻译,可能存在语法或其它翻译错误,仅供参考。如需获取准确内容,请参阅链接中的英语原文或自行翻译。

    您好、Juan:

    非常感谢您的查询。

    似乎在控制台上打印出字符"C"后、便没有完成 SoC 初始化。

    基本上、SoC 可以通过下面提到的一些方法进行初始化:

    • 通过 SBL
      • (这是您遇到问题的地方)
      • 通过 UART Uniflash
    • 直通 SPL
    • 通过 CCS GEL 脚本

    从上述所有步骤中、可以通过 UART Uniflash 初始化 SoC?

    在 COM 端口上看到日志后、从此处开始执行操作: https://software-dl.ti.com/mcu-plus-sdk/esd/AM64X/08_06_00_45/exports/docs/api_guide_am64x/EVM_SETUP_PAGE.html#autotoc_md32

    同时、我将尝试在另一个系统上安装 DFU 闪烁所需的工具、并检查最后是否仍然存在错误。

    此致、

    瓦伊布哈夫

  • 请注意,本文内容源自机器翻译,可能存在语法或其它翻译错误,仅供参考。如需获取准确内容,请参阅链接中的英语原文或自行翻译。

    您好,谢谢您的答复。 我尝试了3种解决方案、但都不起作用。 下面是我得到的回复:

    1)通过闪存 SOC 初始化二进制文件

    2)通过使用 SD 引导进行 SOC 初始化

    3) 3)运行 SOC 初始化脚本

  • 请注意,本文内容源自机器翻译,可能存在语法或其它翻译错误,仅供参考。如需获取准确内容,请参阅链接中的英语原文或自行翻译。

    您好、Juan:

    我认为您使用的是 HSFS 器件。

    我强烈建议您在使用 HSFS 器件时更新配置文件。

    要刷写的 appimages/release/debug 映像应与 HSFS 有关。

    因此 default_sbl_null.cfg  文件随以下信息提供(请检查随附的代码)

    #-----------------------------------------------------------------------------#
    #                                                                             #
    #      DEFAULT CONFIGURATION FILE TO BE USED WITH THE FLASHWRITER SCRIPT      # 
    #                                                                             #
    #-----------------------------------------------------------------------------#
    #
    # By default this config file, 
    # - points to pre-built flash writer, and SOC init bootloader or SBL NULL bootloader for this EVM
    # - The SBL NULL bootloader does below 
    #   - Load sysfw and init sysfw by passing a "boardcfg"
    #   - power-ON and clock setup for the R5F and M4F CPUs.
    #   - reset and run all the CPUs in a "WFI" loop.
    #   - It does NOT boot any applicaiton binary
    # - SBL NULL is useful to init the SOC when the EVM is powered ON, 
    #   so that one can do connect CCS and load application from CCS without needing
    #   to run any DMSC load scripts
    # - This make the CCS development flow lot simpler as long as this one time flashing step is done.
    #
    
    # First point to sbl_uart_uniflash binary, which function's as a server to flash one or more files
    --flash-writer=sbl_prebuilt/am64x-evm/sbl_uart_uniflash.release.tiimage
    
    # When sending bootloader make sure to flash at offset 0x0. ROM expects bootloader at offset 0x0
    --file=sbl_prebuilt/am64x-evm/sbl_null.release.tiimage --operation=flash --flash-offset=0x0

    您需要按如下方式修改和使用它。 (请查看所附的代码)


    #-----------------------------------------------------------------------------#
    #                                                                             #
    #      DEFAULT CONFIGURATION FILE TO BE USED WITH THE FLASHWRITER SCRIPT      # 
    #                                                                             #
    #-----------------------------------------------------------------------------#
    #
    # By default this config file, 
    # - points to pre-built flash writer, and SOC init bootloader or SBL NULL bootloader for this EVM
    # - The SBL NULL bootloader does below 
    #   - Load sysfw and init sysfw by passing a "boardcfg"
    #   - power-ON and clock setup for the R5F and M4F CPUs.
    #   - reset and run all the CPUs in a "WFI" loop.
    #   - It does NOT boot any applicaiton binary
    # - SBL NULL is useful to init the SOC when the EVM is powered ON, 
    #   so that one can do connect CCS and load application from CCS without needing
    #   to run any DMSC load scripts
    # - This make the CCS development flow lot simpler as long as this one time flashing step is done.
    #
    
    # First point to sbl_uart_uniflash binary, which function's as a server to flash one or more files
    --flash-writer=sbl_prebuilt/am64x-evm/sbl_uart_uniflash.release.hs_fs.tiimage
    
    # When sending bootloader make sure to flash at offset 0x0. ROM expects bootloader at offset 0x0
    --file=sbl_prebuilt/am64x-evm/sbl_null.release.hs_fs.tiimage --operation=flash --flash-offset=0x0

    请尝试重新进行 SoC 初始化并更新您的结果。

    此致、

    瓦伊布哈夫

  • 请注意,本文内容源自机器翻译,可能存在语法或其它翻译错误,仅供参考。如需获取准确内容,请参阅链接中的英语原文或自行翻译。

    谢谢你 ,瓦伊哈夫,解决了这个问题,我只有2个问题:

    1) 1)什么是 HSFS 器件?

    2)根据安装指南,这是最后的配置步骤,是吗? 或者、在将任何程序上传到器件之前、是否还有其他步骤?

  • 请注意,本文内容源自机器翻译,可能存在语法或其它翻译错误,仅供参考。如需获取准确内容,请参阅链接中的英语原文或自行翻译。

    您好、Juan:

    非常感谢您的答复。 我很高兴我的解释帮助了你。

    为了回答您的两个问题、我建议您访问几个链接、您可以轻松按照这些链接进行操作。

    1)什么是 HSFS 设备?

    查看以下链接、了解什么是 HSFS 和 HSSE 设备类型: https://software-dl.ti.com/tisci/esd/latest/6_topic_user_guides/key_writer.html#high-security-hs-device-sub-types

    查看以下链接以了解 GP 和 HSFS 器件之间的差异: https://software-dl.ti.com/mcu-plus-sdk/esd/AM64X/08_06_00_43/exports/docs/api_guide_am64x/HSFS_MIGRATION_GUIDE.html#autotoc_md516

    2)根据安装指南,这是最后一个配置步骤,是吗? 或者在我可以将任何程序上传到设备之前是否有其他步骤?

    发布 UART uniflash 后、您需要关闭电路板电源、并将 UART 引导模式更改为 OPSI 引导模式。 在 CCS 中重新连接 COM 端口以查看日志。 为电路板加电。

    请按照以下步骤操作: https://software-dl.ti.com/mcu-plus-sdk/esd/AM64X/08_06_00_43/exports/docs/api_guide_am64x/EVM_SETUP_PAGE.html#autotoc_md32


    或者、请遵循以下附件中所述的步骤:

    请告诉我、这是否会与您产生谐振。  

    此致、

    瓦伊布哈夫