This thread has been locked.
If you have a related question, please click the "Ask a related question" button in the top right corner. The newly created question will be automatically linked to this question.
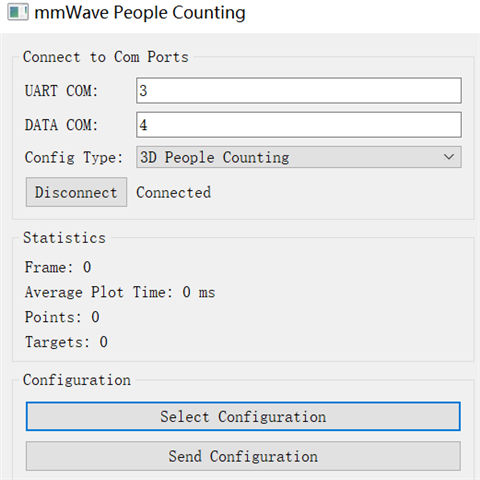
打开GUI选择com口点击连接后,点击select configuration后没有反应。
请问用的是哪个版本的toolbox? 另外一个dos窗口的打印信息是什么?
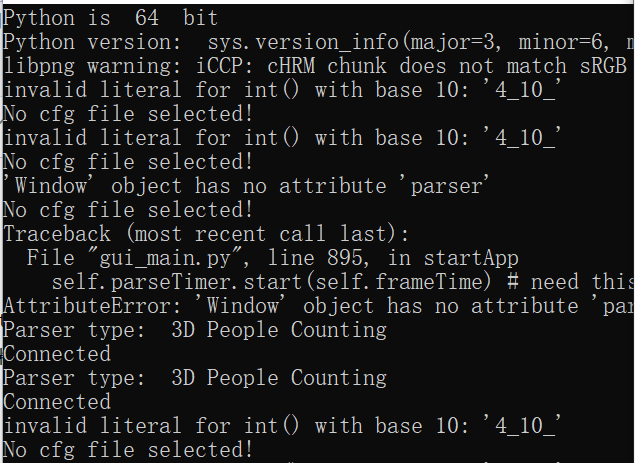
4.8和4.10都存在此问题。dos窗口显示的错误信息如下。
请看一下下面的帖子,可能文件夹名太长,改一下文件夹名。https://e2e.ti.com/support/sensors-group/sensors/f/sensors-forum/1065157/iwr6843isk-people-counting-gui-can-not-select-input-cfg
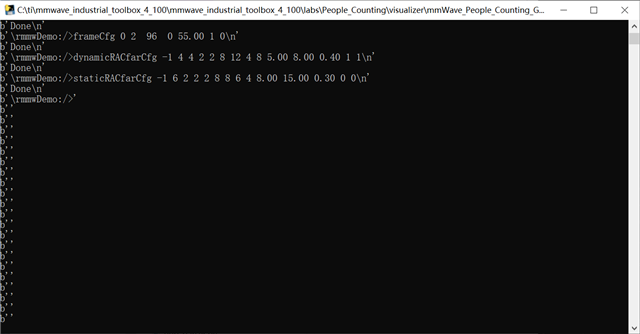
通过链接里的方法可以加载配置文件,但是命令行窗口里依然出现异常,如下图。
请问加载的是AOP_6m_default.cfg配置文件吗?我这边试了一下,这个demo可以运行的。Python is 64 bitPython version: sys.version_info(major=3, minor=6, micro=0, releaselevel='final', serial=0)Parser type: 3D People CountingConnected{'startFreq': 60.75, 'numLoops': 64, 'numTx': 3, 'sensorHeight': 3, 'maxRange': 10, 'az_tilt': 0, 'elev_tilt': 0, 'idle': 30.0, 'adcStart': 25.0, 'rampEnd': 59.1, 'slope': 54.71, 'samples': 96.0, 'sampleRate': 2950.0}Sensor Height = 3-4.0 0.5 -3.0 4.0 6.0 0.0Setting Box 0 to visibleDrew both boxesSetting box 1 invisisbleSensor Height from cfg = 2.0Sensor Height = 2.0-4.0 0.5 -2.0 4.0 6.0 1.0Drew both boxesSetting box 1 invisisbleb'% SDK Parameters\n'b'Skipped\n'b"\rmmwDemo:/>% See the SDK user's guide for more information\n"b'Skipped\n'b'\rmmwDemo:/>% "C:\\ti\\mmwave_sdk_[VER]\\docs\\mmwave_sdk_user_guide.pdf"sensorStop\n'b'Skipped\n'b'\rmmwDemo:/>flushCfg\n'b'Done\n'b'\rmmwDemo:/>dfeDataOutputMode 1\n'b'Done\n'b'\rmmwDemo:/>channelCfg 15 7 0\n'b'Done\n'b'\rmmwDemo:/>adcCfg 2 1\n'b'Done\n'b'\rmmwDemo:/>adcbufCfg -1 0 1 1 1\n'b'Done\n'b'\rmmwDemo:/>lowPower 0 0\n'b'Done\n'b'\rmmwDemo:/>\n'b'mmwDemo:/>'b'\n'b'mmwDemo:/>'b'% Detection Layer Parameters\n'b'Skipped\n'b'\rmmwDemo:/>% See the Detection Layer Tuning Guide for more information\n'b'Skipped\n'b'\rmmwDemo:/>% "C:\\ti\\mmwave_industrial_toolbox_[VER]\\labs\\people_counting\\docs\\3D_people_counting_detection_layer_tuning_guide.pdf"\n'b'Skipped\n'b'\rmmwDemo:/>profileCfg 0 60.75 30.00 25.00 59.10 394758 0 54.71 1 96 2950.00 2 1 36 \n'b'Done\n'b'\rmmwDemo:/>chirpCfg 0 0 0 0 0 0 0 1\n'b'Done\n'b'\rmmwDemo:/>chirpCfg 1 1 0 0 0 0 0 2\n'b'Done\n'b'\rmmwDemo:/>chirpCfg 2 2 0 0 0 0 0 4\n'b'Done\n'b'\rmmwDemo:/>frameCfg 0 2 96 0 55.00 1 0\n'b'Done\n'b'\rmmwDemo:/>dynamicRACfarCfg -1 4 4 2 2 8 12 4 8 5.00 8.00 0.40 1 1\n'b'Done\n'b'\rmmwDemo:/>staticRACfarCfg -1 6 2 2 2 8 8 6 4 8.00 15.00 0.30 0 0\n'b'Done\n'b'\rmmwDemo:/>dynamicRangeAngleCfg -1 0.75 0.0010 1 0\n'b'Done\n'b'\rmmwDemo:/>dynamic2DAngleCfg -1 1.5 0.0300 1 0 1 0.30 0.85 8.00\n'b'Done\n'b'\rmmwDemo:/>staticRangeAngleCfg -1 0 8 8\n'b'Done\n'b'\rmmwDemo:/>antGeometry0 -1 -1 0 0 -3 -3 -2 -2 -1 -1 0 0\n'b'Done\n'b'\rmmwDemo:/>antGeometry1 -1 0 -1 0 -3 -2 -3 -2 -3 -2 -3 -2\n'b'Done\n'b'\rmmwDemo:/>antPhaseRot 1 -1 1 -1 1 -1 1 -1 1 -1 1 -1\n'b'Done\n'b'\rmmwDemo:/>fovCfg -1 70.0 20.0\n'b'Done\n'b'\rmmwDemo:/>compRangeBiasAndRxChanPhase 0 1 0 1 0 1 0 1 0 1 0 1 0 1 0 1 0 1 0 1 0 1 0 1 0\n'b'Done\n'b'\rmmwDemo:/>\n'b'mmwDemo:/>'b'% Tracker Layer Parameters\n'b'Skipped\n'b'\rmmwDemo:/>% See the Tracking Layer Tuning Guide for more information\n'b'Skipped\n'b'\rmmwDemo:/>% "C:\\ti\\mmwave_industrial_toolbox_[VER]\\labs\\people_counting\\docs\\3D_people_counting_tracker_layer_tuning_guide.pdf" \n'b'Skipped\n'b'\rmmwDemo:/>staticBoundaryBox -3 3 2 5.5 0 3\n'b'Done\n'b'\rmmwDemo:/>boundaryBox -4 4 0.5 6 0 3\n'b'Done\n'b'\rmmwDemo:/>sensorPosition 2 0 15\n'b'Done\n'b'\rmmwDemo:/>gatingParam 3 2 2 2 4\n'b'Done\n'b'\rmmwDemo:/>stateParam 3 3 6 500 5 6000\n'b'Done\n'b'\rmmwDemo:/>allocationParam 40 100 0.1 20 0.5 20\n'b'Done\n'b'\rmmwDemo:/>maxAcceleration 0.1 0.1 0.1\n'b'Done\n'b'\rmmwDemo:/>trackingCfg 1 2 800 30 46 96 55\n'b'Done\n'b'\rmmwDemo:/>presenceBoundaryBox -4 4 0.5 6 0 3\n'b'Done\n'b'\rmmwDemo:/>sensorStart\n'b'Debug: Init Calibration Status = 0xffe\n'
是的,就是加载的AOP_6m_default.cfg
板子的S1, S2全都配置成OFF, SOP配置成OFF。
意思是AOP板上的所有开关都置为OFF,boost板上的SOP2跳线帽拔出?
AOPEVM板上SOP是拨位开关,不是跳帽。烧写完flash后,sop有没有拨回去?可以看一下下面的培训视频。https://training.ti.com/hardware-setup-iwr6843aop另外,看一下电脑上不要有其他软件如ccs, uniflash开着。
我是把evm板插到boost上用的,烧写的时候插上boost上的SOP2,烧录完成后拔掉重新上电再运行gui。
我没用boost板,可以先单独用AOP板子试一下。