If you have a related question, please click the "Ask a related question" button in the top right corner. The newly created question will be automatically linked to this question.
Create Image Using UniFlash a. Open on Uniflash v4.2
b. Select “CC3120/CC3220” device from “Enter Device Name” bar.
c. Verify “Serial (UART) Interface” is selected as a connection.
d. Click on “Start Image Creator” button
e. Click on “New Project” button to create new project.
f. Enter project name as “devkit_app” and select device type as “CC3220SF” and device mode as “Production”. Click on “Create Project” button to create project
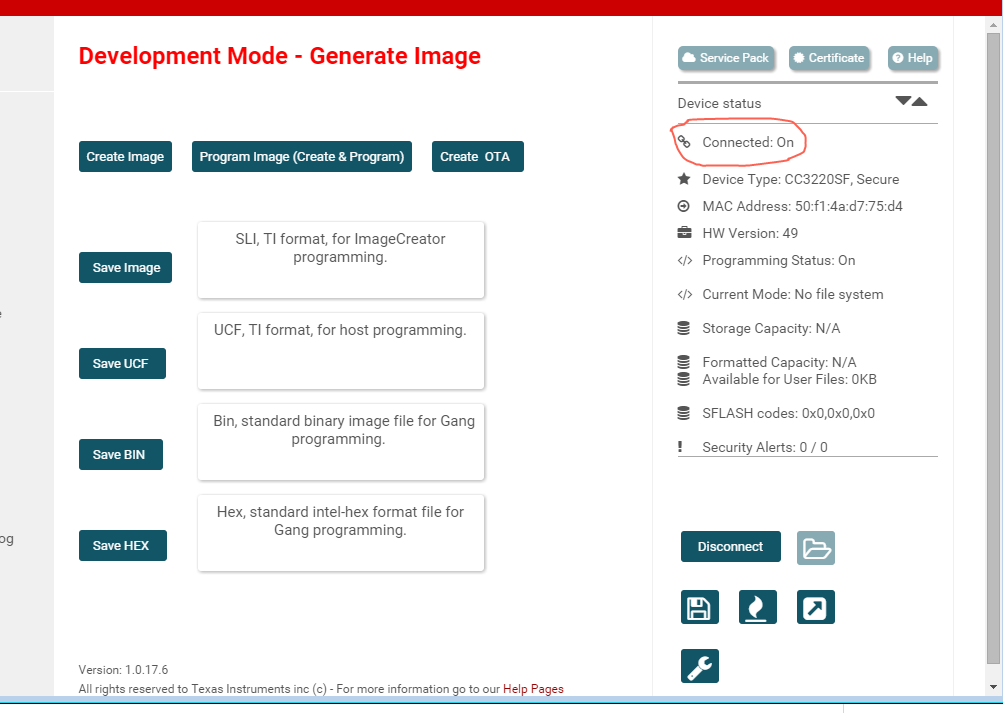
g. Click on connect button to Connect to device.
h. Check if Connection status in On and Device Type as “CC3220SF, Secure”. If device is not secured then skip certificate related steps.
i. Select “Trusted Root Certificate Catalog” under “Files” section
j. Uncheck“Use default Trusted Root Certificate Catalog” option
k. Browse “Source File” to “C:\TI\simplelink_cc32xx_sdk_1_02_02_00\tools\cc32xx_tools\certificateplayground\certcatalogPlayGround20160911.lst” file and “Signature Source File” to “C:\TI\simplelink_cc32xx_sdk_1_02_02_00\tools\cc32xx_tools\certificateplayground\certcatalogPlayGround20160911.lst.signed.bin” file.
l. Select “Service Pack” under “Files” section
m. Browse “Service Pack FIle Name” to “C:\TI\simplelink_cc32xx_sdk_1_02_02_00\tools\cc32xx_tools\servicepackcc3x20\sp_3.2.0.0_2.0.0.0_2.2.0.4.bin”.
n. Select “User Files” under “Files” section
o. Click on add file icon
p. Browse to “C:\TI\simplelink_cc32xx_sdk_1_02_02_00\tools\cc32xx_tools\certificateplayground\dummy-root-ca-cert” to add file. After selection file configuration window will appear .
q. Select “Failsafe” option and click on Write button to add File to project.
r. Select “ Select MCU Image” option in “Action” dropdown menu.
s. Click on “Browse” button and navigate to devkit_app binary located at (Debug-“<PATH TO DEVKIT APP BUNDLE>\app\src\devkit_app\cc3220\CCS\Debug\devkit_app.bin” and Release-“<PATH TO DEVKIT APP BUNDLE>\app\src\devkit_app\cc3220\CCS\Release\devkit_app.bin”
t. Select “Failsafe”, “Secure” and “Public Write” options
u. Select “Private Key File Name” from the drop down menu and browse to “C:\TI\simplelink_cc32xx_sdk_1_02_02_00\tools\cc32xx_tools\certificateplayground\dummy-root-ca-cert-key”.
v. Select “dummy-root-ca-cert” from “Certificate File name” dropdown menu.
w. Click on add file icon.
x. Add “ajax_script.js”, “arrayentlogo.png” and “index.html” (located at <DEVKIT RELEASE BUNDLE>/app/devkit_app/resources/arrayent) file using add button.
y. Click on “Generate Image” icon .
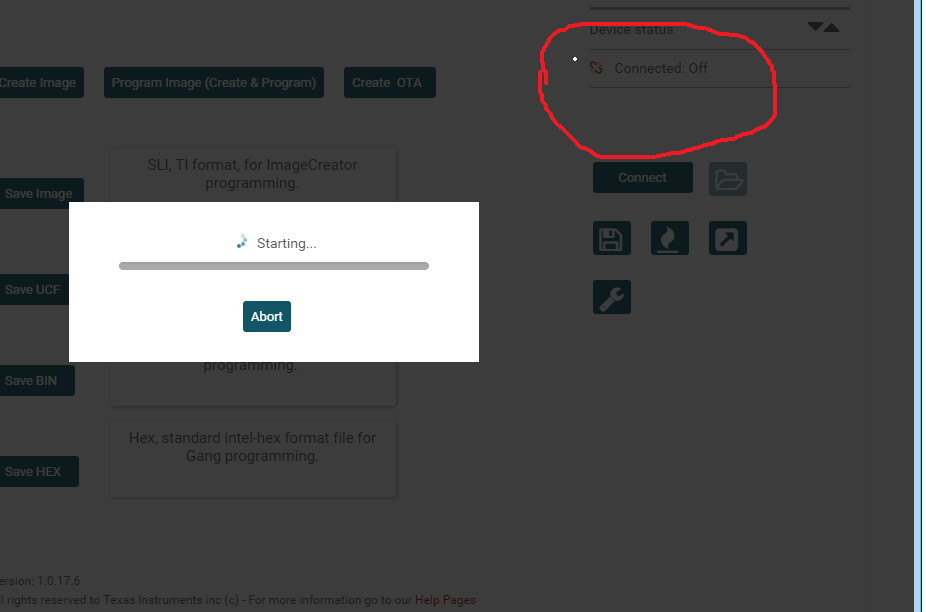
z. Click on “Create Image” button to generate Image.
aa. On successful Image generation “Operation Successfully Completed “ Message will pop up. Click on close button to close the popup.
bb. Click on “Save Image” to store “.sli” file to local storage.
cc. Click in “Program Image(Create & Program)” button to Create and Program Image to device.
dd. On successful flash image to device, “Programming Complete” message will appear