Other Parts Discussed in Thread: HALCOGEN, TMS570LS0914
请注意,本文内容源自机器翻译,可能存在语法或其它翻译错误,仅供参考。如需获取准确内容,请参阅链接中的英语原文或自行翻译。
器件型号:TMS570LS0714 主题中讨论的其他器件:HALCOGEN、 TMS570LS0914
大家好!
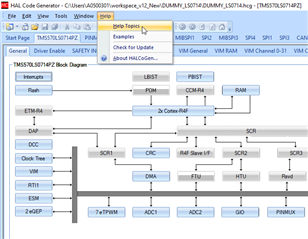
我想在 TMS570LS0714APZ 上的多路复用引脚12上生成 PWM 信号(~60kHz)。 该引脚的默认功能是 GIO。
我在一些文章中介绍了使用 NHET 模块生成可变占空比 PWM、但我发现很难使用 HET 编译器生成该占空比(如果我错、请更正我)。
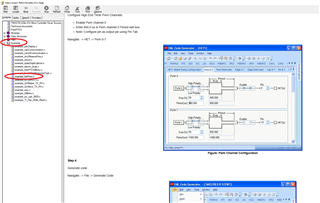
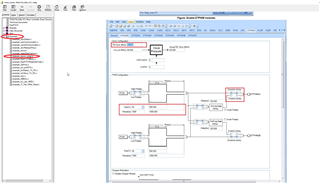
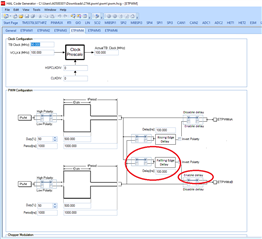
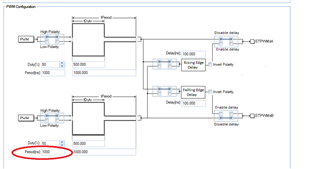
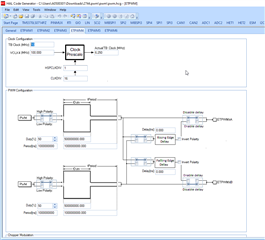
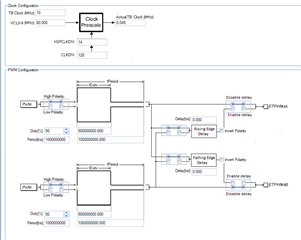
我认为的另一个解决方法是引脚上的 ePWM 功能。 如何才能做到这一点?
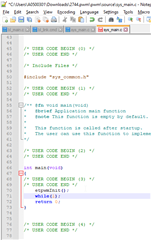
为此需要执行哪些步骤?
请询问您是否需要任何其他详细信息。