请注意,本文内容源自机器翻译,可能存在语法或其它翻译错误,仅供参考。如需获取准确内容,请参阅链接中的英语原文或自行翻译。
器件型号:SM73201 您好!
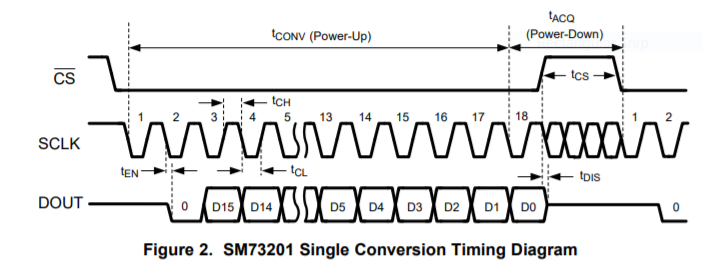
我正在尝试 使用 Arduino 读取 ADC SM 73201。 根据数据表、它是二进制补码二进制文件、您可以给我一些提示、告诉我如何读取 ADC 值并转换为电压。 我的基准电压为2.048。
谢谢
Ahmed
您好!
我正在尝试 使用 Arduino 读取 ADC SM 73201。 根据数据表、它是二进制补码二进制文件、您可以给我一些提示、告诉我如何读取 ADC 值并转换为电压。 我的基准电压为2.048。
谢谢
Ahmed